The Night is Grey: Full Walkthrough
The Night is Grey is an excellent point-and-click adventure game from Whalestork Interactive. It’s a slow-burning thriller with an unexpected ending. Play as Graham as he tries to help Hannah find her parent. On his unforgettable adventure, Graham encounters wolves, an abandoned mine, a mysterious ranger, and several complex puzzles as he tries to find a way out of the desolate landscape.
Inspired by classic point-and-click games, The Night is Grey lets you explore environments to find clues and items, interact with objects, and solve inventory-based and logical puzzles to progress. There are also a few quick-time events that will test your reflexes. They are part of the puzzles and need to be completed to progress. Our walkthrough will help you find solutions for all important puzzles.

Table of Contents
Chapter One
In the first scene, after the monologue, click/right-click on the extreme right path to proceed. Next, click the large house in the background and then click the creaky door to enter the house.

Paths are shown as arrows (↑, ↓, →, ←), and pressing the RMB on a path lets you fast-travel to a new area.
Talk to the girl. There will be a few dialogue choices that don’t affect the story in any way. Once you are done choosing all dialogue options, the conversation ends. Click on the “Key cabinet” next to the coat hanger behind Graham to pick up a metal box. Press and hold the spacebar to highlight the key cabinet if you can’t find it in the dark. Exit the house.

Move your mouse cursor to the top to open the inventory. Right-clicking an item on an inventory lets you inspect it.

On the inventory menu, right-click on the small metal box to inspect. There will be a set of keys inside the box. You now have the keys to open something, but what could that be?

You will find two gas cans outside the house below the windows. The third gas can be found on the extreme right side of the screen. Press the spacebar to highlight them. Both cans at the bottom of the window will be empty. Click on the third gas can.

Exit the house scene by clicking on the bottom path.
Move closer to the shack on the right and click on the door. It would be locked. Use the keys to unlock the door. To use items on certain objects, you must drag them from the top of the screen and drop them onto the objects. In this case, drag and drop the keys onto the shack door to unlock it.
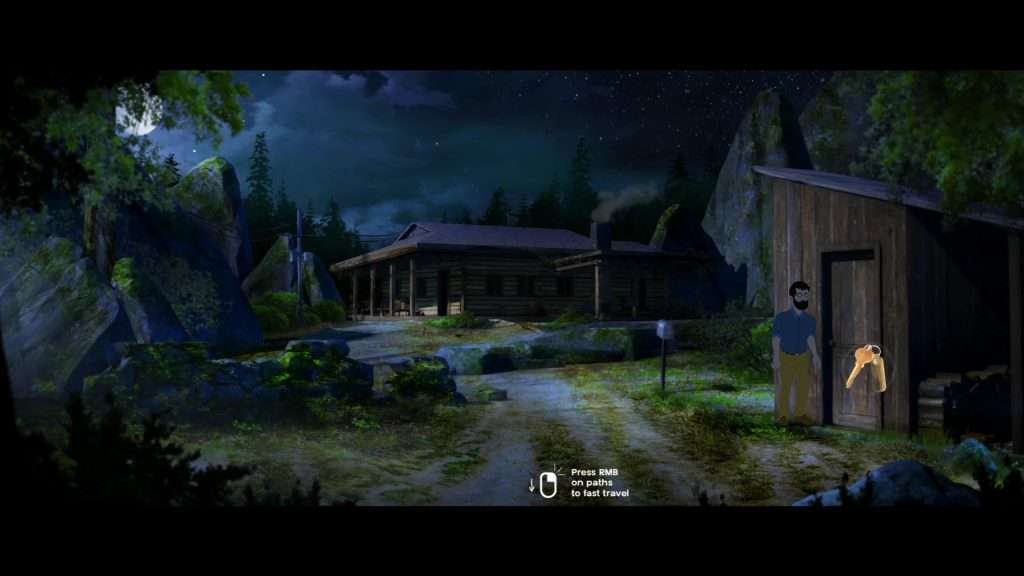
Inspect all important areas inside the shack by clicking on them. Press and hold the spacebar to highlight them.

Pick the duct tape kept on the workbench. Since it’s dark in there, you may not be able to see some items. Click on the power light cord behind Graham to check. No power and you must restore power by fixing the generator. Exit the shack.
Click on the extreme left to travel to the bridge road area. Click left to cross the bridge. You will see a group of deadly wolves. Graham decides not to travel further fearing he will be eaten alive by them.
Go back to the previous area and click the top-right path to enter the docks, where you will find a generator.

There’s a piece of cloth stuck at the bottom of the transmission tower. Click to pick it up. Graham will wipe his glasses with it.
Click on the generator. Open the lid at the top. Drag and drop the gas onto the fuel port to fill the storage tank.
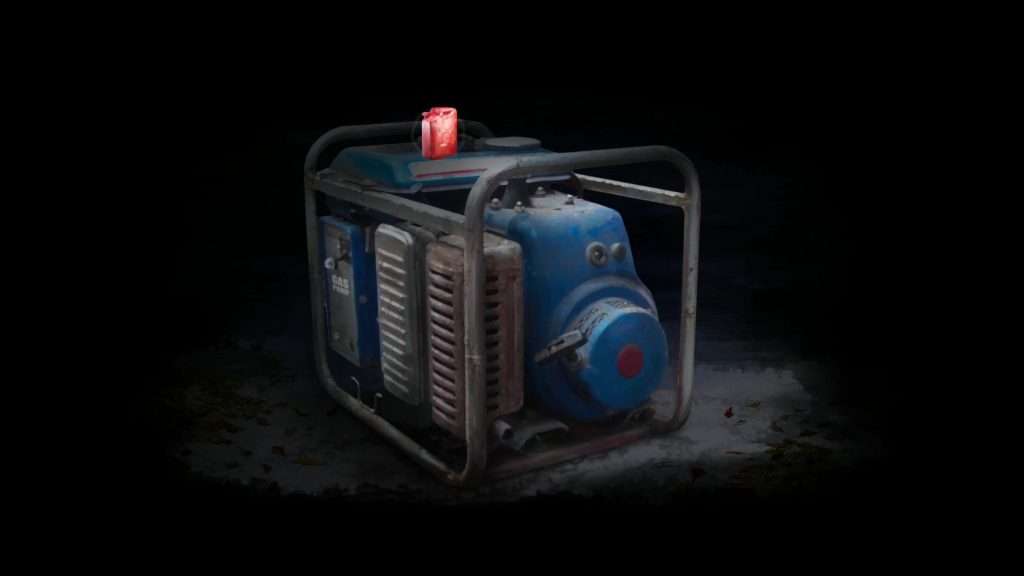
Close the fuel port and pull the cord. It won’t turn on. Click the switch on the “Gas Pump” to turn it on. It still won’t turn on. You will have to repair the motor belt. Tap the front part of the generator to open the motor. Click on the broken belt to collect it.
Move your cursor at the top of the screen to open the inventory. In the inventory itself, drag and drop the duct tape onto the broken motor belt to repair it.

Once fixed, open the motor section again and drag and drop the repaired belt back into its place.
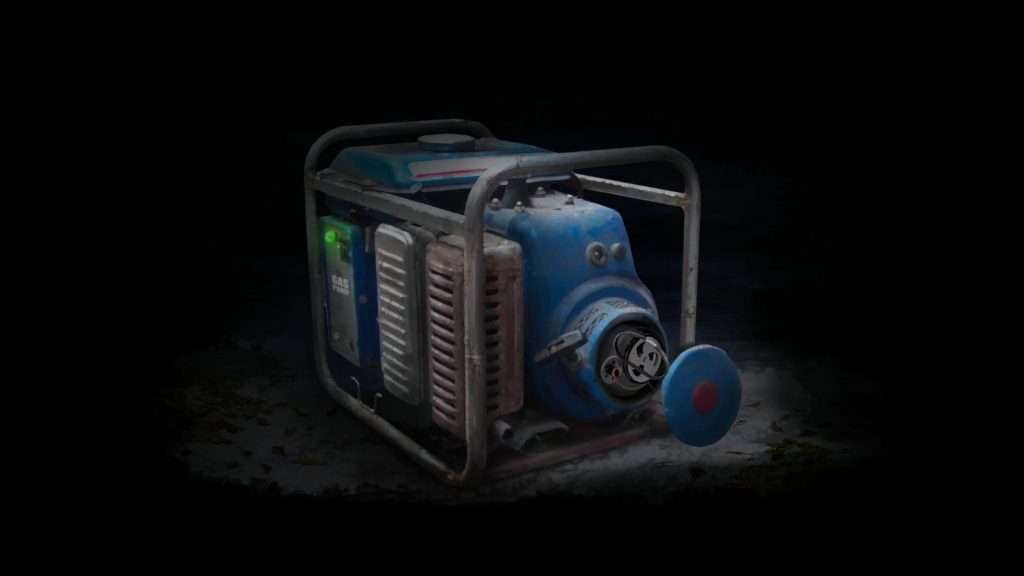
Pull the cord to trigger a quick time event to control the generator. This quick-time event will help you start the gas generator. A small motor icon will appear on the screen, all you have to do is click on the screen when the moving dot reaches the white arc. The speed at which the dot moves will increase and the white arc’s size will decrease every time you succeed in this quick time event. You will have to play it three times to start the generator.

When the generator starts, go back to the shack, click on the light power cord, and switch on the light.

Click on the “Handleless Saw” on the top. Graham tries to grab it but fails as it’s placed high up in the attic. Exit the shack.
Go back to the big house to talk to Hannah. While talking, Hannah will leave the house. Press space to view key highlighted items. Take the butter knife from the table.

Exit the house. Click on the downward-pointing path to exit this scene.
In the next area talk to Hannah again. She will be sitting on the pile of rocks. She will reveal who her mom is and will tell you more about her grandparents and their whereabouts. Graham decides to take her to her grandparents’ house since her mom is missing.
After the conversation ends, a few dialogue choices will appear on the screen. Choose “I need your help reaching a place”. Click on the shack. Inside the shack, the little girl recognizes her toy “Storky” and grabs it.

Click on the attic and Hannah will help Graham take the handleless saw. A quick-time event will be triggered. Click on the screen at the right time when the dot moves in the gap between two vertical lines.

Hannah gives her favorite toy storky to him so that he can repair it and give it back to her.
Click on the bottom of the screen to move to an abandoned path that leads to a new location. This path is blocked by a poison ivy bush. You will need something to remove the bush.
Combine the handleless saw with the table knife and the duct tape to repair the saw. All you have to do is combine the table knife with the saw and then use the tape to hold them together.

Now use the makeshift saw to cut through the poison ivy bush and click on the right to walk along the abandoned path.

The path is steep and you must bring Hannah to continue your journey. Go back to the little girl and talk to her. Graham informs her that he found an alternate way to the village much safer than the bridge. He also promises to leave a note so that when Hannah’s mom comes back she will know where they are heading.
To leave a note go back to the large house. Inside the house, click the notepad. Graham needs to find something to write with first.

Get back to Hannah and ask her if she has a pen or something. She says she has some pretty crayons but mommy threw them away as they were old and gritty.

To find the crayons, go back to the large house. Outside the house, there’s a trash can. Click on it to pick a red crayon.

Go inside the house and use the red crayon on the notepad to scribble something on it. Exit the house and talk to Hannah again.

You can unlock additional dialogues by showing/giving items to characters. Just drag and drop the red crayon onto Hannah to unlock a new dialogue with her.
Click “All Done! Let’s go!” to move to the alternate path. The first chapter ends.
Chapter Two
As soon as Graham reaches an alternate path to the village, he finds himself in trouble again. This time, he has to solve a few puzzles to find another way to reach the village.
In this chapter, there are three areas: Area 1 – this is where you can see an old pickup truck.

Area 2 – Across the electric fence, has access to the mine entrance.

Area 3 – Has a miner’s hut, a workbench, and an oil barrel. There are other objects scattered all around this area.

Move left towards the electric fence and open the door to enter Area 2. Don’t forget to press the spacebar to highlight important items in this area.
Click on the broken oil lamp to take the wick. While picking up the wick from the oil lamp, Graham discovers a connector underneath the lamp.
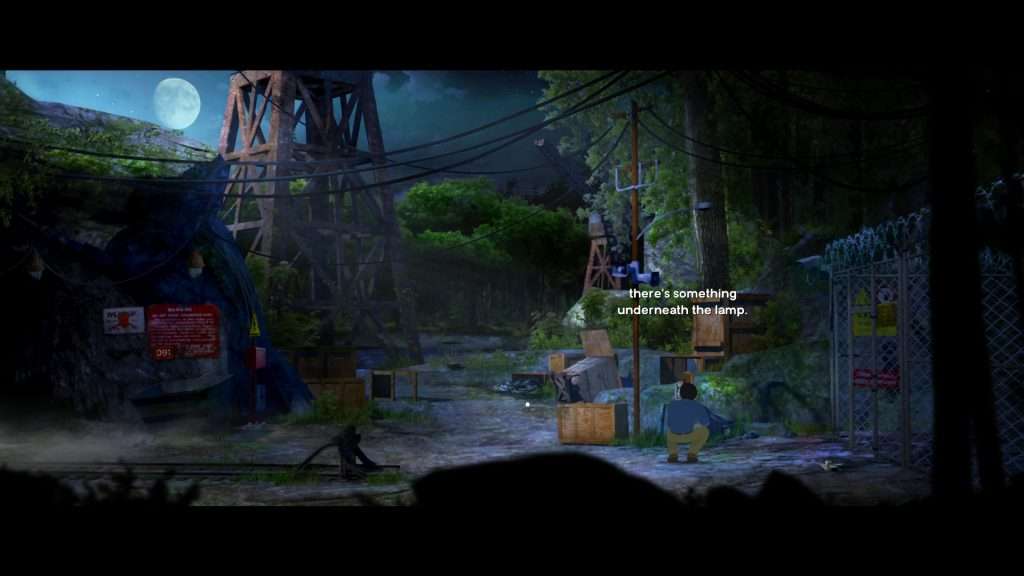
Click on spare cables to pick a wire.

Click on the “warning sign”Employee Counter” to read it – “Approved license for 91 workers”. Note down the number “91” as it is part of a riddle/puzzle you will need to solve later in this chapter.
Exit this area through the electric fence to move back to Area 1. Right-click on the extreme right to exit this area. While walking along this path, pick up the handle.

Now continue walking to the right side to access Area 3.
Take the screwdriver from the red toolbox.
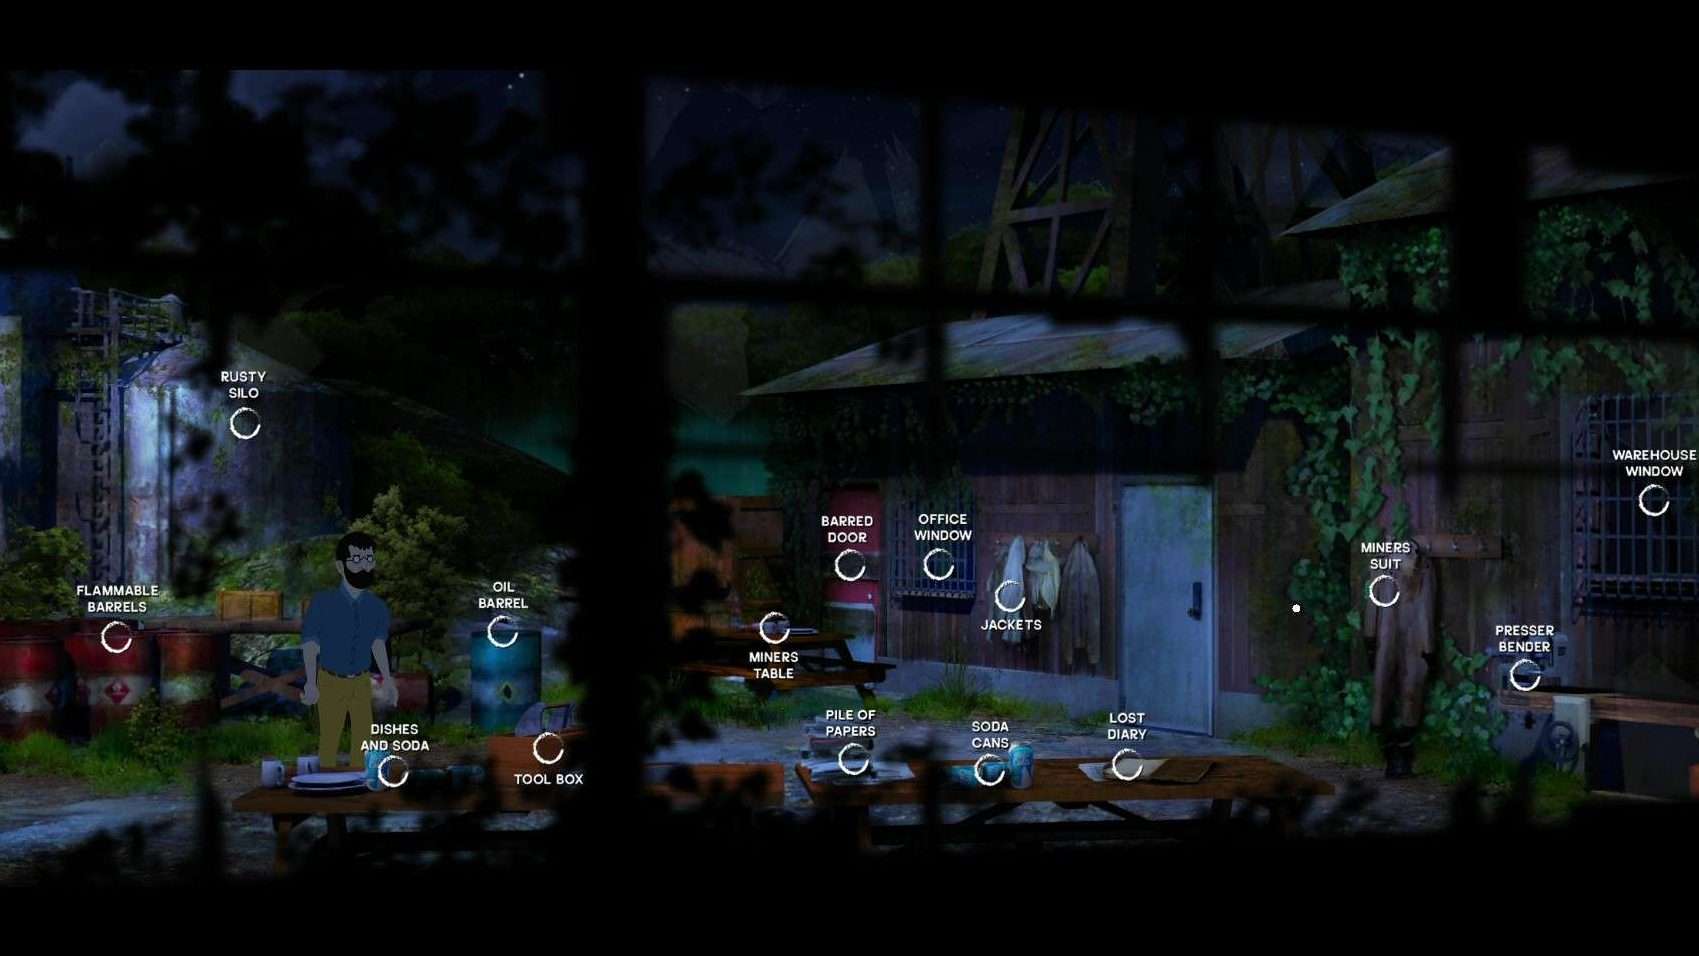
Read the personal journal kept on the workbench. Once the document unlocks, click on the first page to read it. Note down the Code 331652 at the bottom of the page.

Turn the pages of the document and read them to discover a riddle. While going through the pages of the journal, pay attention to the number of workers under these dates –
November 7th – “I lost 5 working souls today”
December 2nd – “I got 9 less workers and all the rest are starting to mutiny.”

Subtract 5 and 9 from the total 91 approved workers to get the number 77. We found number 91 in the warning sign in Area 2. After losing 14 workers, the number of workers that remained alive was 77. This number will play an important role in the next puzzle.
In the same area, use the knife on the blue oil barrel to pry it open. Next, dip the handle in the barrel to oil it up.

Back to Area 1, use the screwdriver on the pickup truck’s headlight to salvage another wire. You now have two wires – the first one was salvaged from spare cables in Area 2.

Once you do that, Hannah asks whether Graham is a “Hobo”. Start a conversation with her by choosing additional dialogue options at the bottom of the screen.
The Power Box Puzzle
In The Night is Grey, the power box has a number puzzle. You must turn on the power box to electrify Area 3, including the electric fence. The hints for this puzzle can be found in Area 2 and Area 3. In Area 2, we found out that there were a total of 91 approved miners and in Area 3, the document revealed that out of 91, the owner of the mine lost 15 miners, reducing the total to 77.
For the power box puzzle, you will also need two wires, the first one was found among the spare cables in Area 2, and the other one was salvaged from the pickup truck headlight in Area 1. Along with the wire, you will also need a handle, which we picked up on our way to Area 3. We also dipped the handle into the oil barrel to oil it.
After the conversation ends, walk towards the electric fence on the left. Take the wire that was salvaged from the spare cables and use it on the barbed wires of the fence. Doing this will strip the wire. You now have two stripped wires – this one and the second one from the truck headlight.

Click on the power box. Attach the oiled handle to the slot near the red button.
Next, use the screwdriver to open the bottom panel and click the burned wires in the panel to remove it.

Combine both wires in the inventory. Now, drag and drop the wires onto the open panel to fix the exposed part.

There are five green switches on the power box. You can turn on/off these switches by clicking on them, but pay attention to the numbers when doing so. Toggling all switches “down” will reveal another set of numbers.
The puzzle here is to toggle the switches up/down so that the numbers add up to 77. Read paragraph 1 in this section to know how we got this number. You need to toggle a few switches up and a few down so that the numbers on the switches sum up to 77 (31+23+12+09+02). Next, click the handle to turn on the power. Here’s the solution to the power box puzzle:

The fence will now be electrified. After talking to Hannah, the game autosaves.
Move to the power box again and switch off the power. Click the handle to switch off. You must switch off the power first to enter area 2 through the fence door. Click to open the fence door now that it isn’t electrified.
In Area 2, drag the screwdriver onto the doorstopper to keep the fence door open. Exit Area 2 and click the power box > handle again to restore power. This way, you can freely enter and exit this place.

Go to Area 3. Click on the jackets near the locked door of the miner’s hut to search and find a red key.

Press the spacebar to the location of the “Miner’s Suit”. Click on the miner’s suit and Graham will rummage through the suit to find an ID card.
Click the jackets again to remove one of them. There’s a hidden electronic lock hidden behind the jacket, near the miner’s hut door.
Move your cursor to the inventory section on top of the screen and right-click on the ID card to get more information on it. The ID/Access card will be displayed on the screen. Click on it to turn it over. You will find six color-coded numbers as shown in the screenshot below:

Pay attention to the background color of each number. These numbers will work like keys to open the locked door in the miner’s hut. Recall the secret code displayed at the bottom of the journal’s first page. The code is 331652.
Now click on the electronic lock next to the locked white door. You will notice six different colors on the lock. These are the same colors as seen on the back of the ID card. Drag and drop the ID card from the top of the inventory to the card reader slot on the right.

Graham will swipe the card down and the red light on the electronic door lock will blink.
Each number on the back of the ID card has a unique color assigned to it. All we have to do is assign the same colors to the code 331652 and press the corresponding colored buttons on the lock to open the door.
3 (Yellow)
3 (Yellow)
1 (Dark Blue)
6 (Green)
5 (Magenta)
2 (Button with faded brown color. It’s just above the Magenta colored button )
The green light indicates the door has opened. Enter the miner’s hunt.

Inside, take the “Shaft Lifter Key”. Now Click on the “television screen”Screen”.

There will be two dials on the left side of the screen.

Click on the channel dial once to turn on the television. Now click on the channel dial once again. On the screen, you will see the camera pan and point to the mine entrance.
The rotation dial is below the channel dial. Rotate this dial toward the right four times and the screen will display the location of another connector inside a crate. It can be found in Area 2 in this location (“Connector Piece”):

Before reaching Area 2 to pick up the connector, you should straighten the bent Shaft Lifter Key. Exit the miner’s hut and move towards the “Presser Bender” tool. Drag and drop the Shaft Lifter’s key to straighten it up and a quick time event will be displayed on the screen.

A picture of the presser bencher and the shaft lifter key will be shown on the screen. Click on the screen when the dot is between the two arrows facing each other. You will have to do this three times. The dot will be moving backward and forward at a much faster rate in each new session. so make sure you click the screen at the right moment.
Go to Area 2 and pick up the second connector. If you can’t find it, press and hold the spacebar to highlight its location.
Click on the red connector box to solve the puzzle.
Drag and drop the red key onto the connector box’s key slot to open it. We found this red key while rummaging around the jackets near the miner’s hut in Area 3.
In this puzzle, you will have to place three connectors as shown in the screenshot below. Firstly, click on the connectors already installed on the red box to remove them.
Now place these three connectors side by side, from the left to right:
Click on the switch to turn on the red connector box. This will power up the mine entrance.

After solving this puzzle, Graham will throw away the spare connectors.
Click on the extreme left to enter the mine through the entrance.
Move to the mine shaft and use the “Shaft Lifter Key” (Manhole Key) to open it.

Go back to Area 1 and talk to Hannah. Choose the remaining dialogue options to finish the conversation. Hannah agrees to accompany him to the underground mine.
Enter the mine through the entrance again in Area 3 and click the mine shaft to go down. Chapter 2 ends.
Chapter 3
Graham needs to find a way out of the mine to safely take Hannah to her grandparents, but exploring the underground tunnels won’t be easy. The exit is flooded and it’s not easy to find a solution to drain out the water especially when you have to explore a complex maze-like mine. This is one of the most difficult chapters of The Night is Grey, so pay attention to every word in this walkthrough or watch our gameplay video:
Piggybacking Hannah, Graham descends the ladder to explore the underground tunnel, thinking of finding a way to the village. Click left to enter the tunnel.
Graham and Hannah’s conversation is interrupted by a loud noise. Graham walks back to the ladder to investigate. The old ladder is broken and there’s no way to go back up.
Take the red pump wheel and go back to Hannah.

On the left side is an old mine map pasted on the wall. Click to take it, It will help you explore the tunnels. You may then click on the map in your inventory at the top of the screen to zoom in.

Next, click on the “Pumping Instructions” pamphlet.

Now comes the most difficult part of this chapter – exploring the tunnels. While moving from one tunnel to another, pay attention to these arrows at the end of each path: ↑ ↓ ← →
We will use the same arrows to guide you to every part of the tunnel:
Go ↑ then →
Click on the wooden crate. Use the ID card on the gap to force open the crate. The ID card breaks but the crate opens.

Inside you will find a broken oil lamp and an old dossier. Take the lamp.

Click on the dossier to move them. Behind them, there’s a valve. Take the valve.
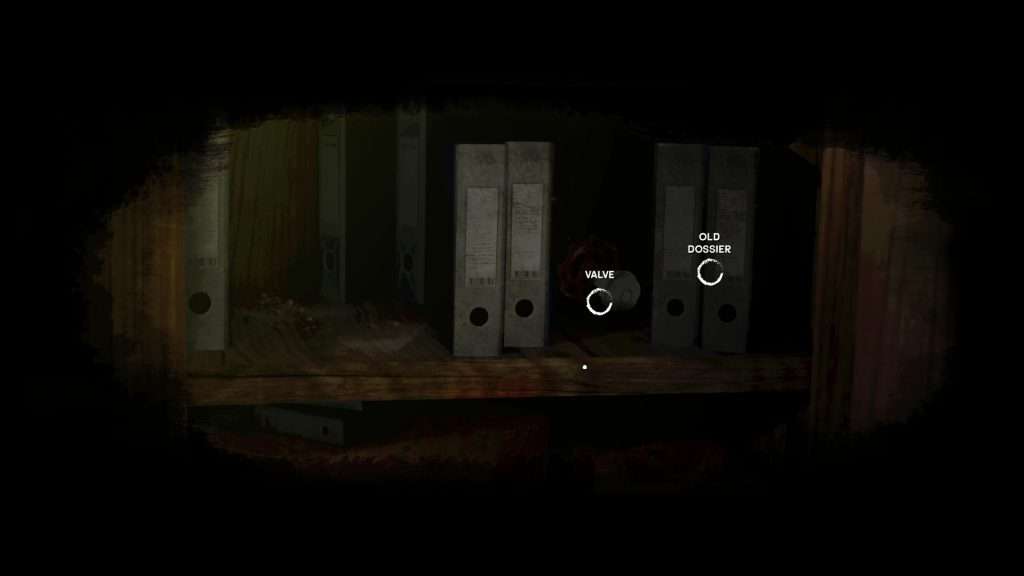
Exit the crate.
Turn ← and Go ↓ (back to Hannah)
Click to talk to Hannah. She gives a matchbox which she found lying around.

Soon after you take the matchbox, there will be a few dialogue options in the lower-left corner of the screen. Click on every dialogue to continue talking to Hannah.
After finishing the conversation with Hannah, Go ↑.
In your inventory, combine the wick with the old broken lamp. Remember we got this wick from Area 2 in Chapter 2. You just have to drag and drop the wick onto the lamp in your inventory at the top of the screen.

With the wick in the lamp, you can light up the lamp now. It will be very useful for exploring the dark tunnels.
Use the matchbox on the exposed part of the rusty blue oil barrel on the left. Drag and drop the matchbox onto the rusty part.

Graham will use the oil from the barrel first and strike the match against the rusty part of the barrel to light up the lantern.

Now that the lantern is lit up, you will need to be careful not to venture too deeply into the tunnels, or else the light will go out. The oil won’t last long. The light gets weaker each time you reach a new place while exploring. Thankfully, you will find a few oil barrels lying around some of these places.
After lighting up the lamp, Go ↑ and then turn →. Graham will find another oil barrel and will use it to refill his lamp.
Go ↑ and then again ↑.
Turn → and go ↓.
Graham will find the third old barrel. He will refill the lamp.
Turn → to reach the store room. Take the blue valve and read the journal.

Turn ← and go ↑.
Turn ← and then again ← two times.
Garahm finds the fourth barrel and refills his lamp. Move ←.
Go ↑. Drag and drop the blue valve wheel onto the empty valve socket on the right and then click on it to turn the wheel. The red light will turn green indicating activation.

Go ↓ and then turn →. Graham refills the lamp again.
Turn → and then continue walking → and →.
Go ↑ and then ←. Graham refills his lamp.
Go ↑ and then turn →. Go ↑ again. Turn ←. Graham finds yet another blue barrel and refills his lamp.
Turn → and then → again.
You will reach another pump room. Click on the blue wheel to turn on.

Go ←, ←. Graham refills his lamp. Continue walking in the same direction ←, ←, ← and ←.
Continue ←. Graham encounters a pack of wolves.
The conversation with the wolves is a bit long and you will have to choose the right answers from multiple choices:

1. Answer to us. Hunger is the truth. You’re running from it. But you found a girl in a cabin. Why not let us eat?
Answer: I think you are already full.
2. Mining for salvation. Found a business of death. It made meat dollars. Secrets. Will you share them?
Answer: I just want to help Hannah.
3. Are you just going deeper and deeper into our darkness? Grasping at matchsticks. Smells like Gas. But you found us. What will you do now?
Answer: I will do what I need to.
4. You are up there on your tower. Thinking you are above nature. But we are here waiting. What are we?
Answer: Monsters
5. By the water. A fawn. All prey must come to drink and risk being eaten. How does the wolf trap its dinner?
Answer: It just does.
6. When is love a crime?
Answer: It always is.
After the conversation is over, the wolf transforms into the corpse of a woman. It’s the most terrifying scene in this game.
Graham wakes up. He is still in the tunnel. Was it a dream? Were those wolves real? He must have imagined it. He refills his lamp again.
Go ↓ and click to turn the blue wheel. This will activate another pump.

Go ↓ and then ↓ again. Refill the lamp. Turn →
You are now in a big room. There will be several interconnected pipes and three red valves. This is the machine room puzzle. Solve it to pump excess water successfully.

Press the spacebar to highlight everything in the pump room. Click on the “Mine Report” and take the key. Read the report.

Click on the first red valve to unscrew it. You now have two red valves in your inventory.
Put the two valves on these valve sockets as shown in the screenshot below:

Take the third valve and put it on this socket:

Use the large red valve wheel and put it on the main pump wheel socket. Click to turn the valve wheel.

You have activated the machine to pump excess water out of the mine.
Use the key from the mine report to unlock the rusty blue door on the right. Exit through that door.
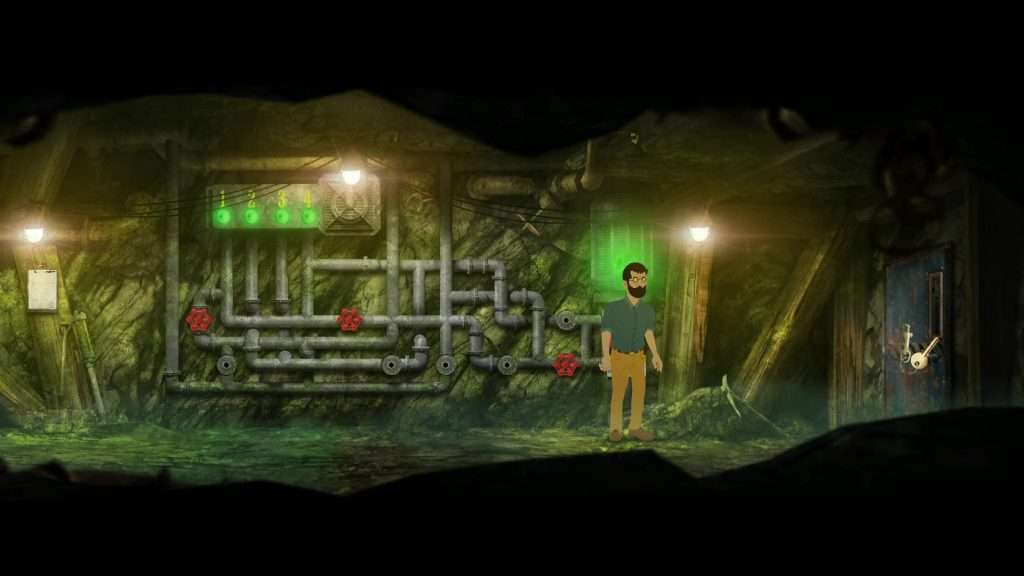
Go ↓. Graham talks to Hannah and they both escape the mine. End of chapter 3.
Chapter 4
After escaping the mine, Graham and Hannah seek refuge in a watchtower before heading to her grandparents’ place. They are close to getting to the village, but there’s a park with a locked gate, and that’s the only way up to the village. You must solve a few simple, yet challenging puzzles to find the Park gate’s key.
Note: In this chapter, there are two instances where you will have to click the right mouse button around certain objects to find items.
After the conversation with Hannah ends, click on the Ranger’s Journal, on the table, inside the watchtower. Read the contents.

Take the piggy bank and the metal funnel.
Right-click on the guitar to discover a new item. Then right-click or left-click on it again to pick a strange-looking plastic disc.

Click on the ranger’s journal again and then click on the pink-colored note. Read the riddle. There will be a couple of hints to find certain symbols scattered throughout the park area.
Use the red crayon on the blank paper. It’s the last page of the journal. You will find another hidden hint. It’s a picture of a park bench and another plastic disc. It seems the plastic disc is hidden underneath the bench according to the traced picture.

There’s a powerbox outside the room in the ranger’s watchtower. Click to open it and turn on the power by flipping switches up for the “Park Entrance/Exit” and “Rock Path”.

Exit the watchtower. Go → to a new area.
Graham hears the sound of whistles. It’s Hannah whistling and it might be another prank. Go back to the watchtower to check whether she is safe or not. Upstairs, talk to Hannah. Seems like she is messing up again. Graham scolds her. exit the watchtower again. The game will autosave here.
Go → again. This area has a park info map, a trash basket, and a park bench. There’s also a big mossy rock behind the park bench.

Click on the paper drawing next to the park info map. The paper contains hand-drawn shapes. It’s a hint of a puzzle. Make a mental note of it or take a screenshot, as shown below:

From the inventory at the top of the screen, click on the piggy bank and drag it towards the mossy rock. Graham will smash the piggy bank against the rock breaking it into pieces.

Click on the broken piggy bank. Graham will pick a 10-cent coin from the pieces.

Turn ← to move to the park entrance/exit area. Press and hold the spacebar to highlight important areas of interest.

Click on the power plug to plug it into the socket. This will power up the soda machine. From the inventory, put the coin into the soda machine and take the soda can.

Go ↑ to exit this area. Go ↑ back again to the watchtower. Give the soda can to Hannah as a peace offering. She drinks it and loves it. You now have an empty soda can.

Choose dialogue options to talk to Hannah. After finishing the conversation with her exit the watchtower.
Go to the park bench area. Move ↓ to visit the Apiary, aka the Bee Yard. Graham thinks he has woken up the bees. He needs to find a way to shoo them away and move past the beehives.
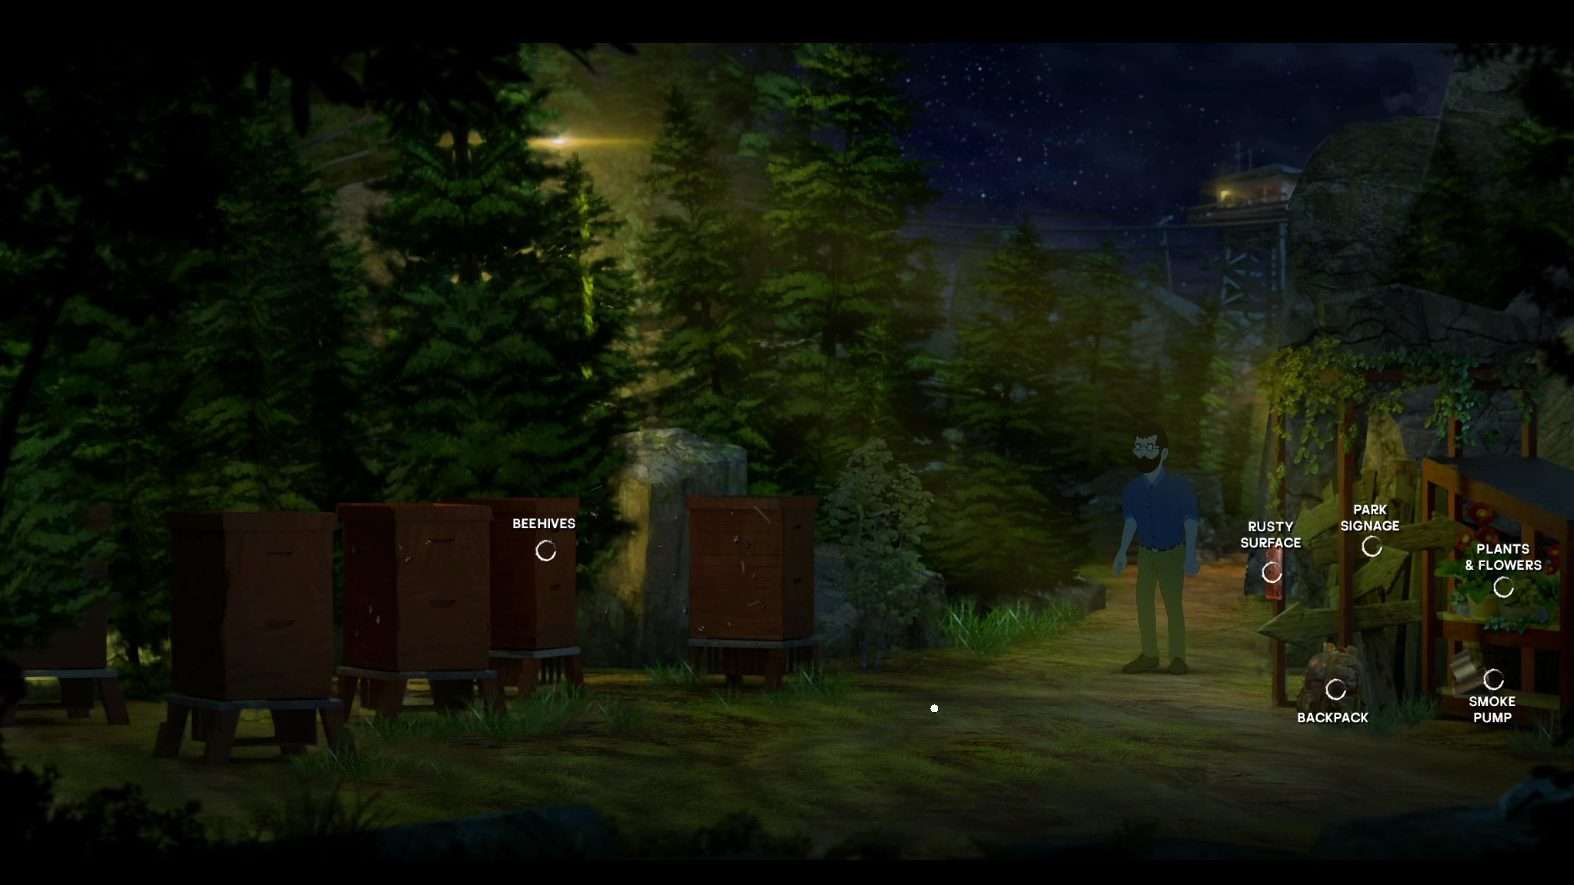
In the Apiary, click to pick the smoke pump. Press and hold the spacebar if you can’t find it.
Exit the bee yard to go back to the park bench area. In the same area, go → to the “Rock Path”.
From your inventory at the top of the screen, drag the empty soda can onto the nails on the pole to punch some holes in it.

Go back to the park bench area > apiary.
On your inventory, combine these items to create a makeshift bee smoker. All items will be there in your inventory. Combine all five items in the same order as shown below:
Empty soda can + Smoke pump + Funnel + Duct tape + Mine Map

To light up the bee smoker, use the matches on the “Rusty Surface”. Press and hold the spacebar to find the rusty surface.

Graham uses the bee smoker to clear the area. He then keeps the bee smoker on a small shelf in the lower-right corner. The game autosaves here.
Exit the bee yard by moving ←.
In this new location, you will find two toilets and a bench. When Graham enters the area, he hears someone shouting from one of the makeshift toilets. It’s the park ranger! He wants toilet paper and asks Graham to bring one. The toilet paper can be found in a cabinet at the base of the watchtower. Continue the conversation by choosing the following dialogue choices:
1. What’s in for me?

2. So how can I help?
3. Sorry about your piggy bank
4. I found a weird disc thing – the park ranger says it’s his daughters’. She likes puzzles and easter hunts.
In the same area, you will see a park bench next to the “Trash Basket”. Right-click on the park bench. Graham will search underneath the bench and get the second disc. The first, smaller disc was found inside the guitar in the watchtower room.

Exit the toilets and move straight to the watchtower.
Open the power box and turn off the lights for these areas – Park (Entrance/Exit), Toilets, and the Rock Path. Flip the switches down.

Move out of the watchtower and visit all the above areas to find hints in the form of shapes. They glow in the dark, which is why we turned off the lights.
Rock Path – Glow in the dark anchor shape etched on the log.

Toilets – Open the door of the third toilet near the bench. You will discover another shape. The flag of a pirate ship.

Park Entrance/Exit: Glow in the dark crab on the ticket sales cabinet wall.

The fourth hint can be found in the park ranger’s daughter’s journal. Find the heart shape drawn on the pink page.
Go back to the watchtower area. There’s a small Wood Cabinet at the base of the watchtower. This is where the park ranger hid his toilet paper. Make sure you press and hold the spacebar to find its location. Click on the wood cabinet to start solving the puzzle.
Click on the small barrel-shaped lock to zoom in. You will find shapes similar to those in the park, toilets, and the Rock Path.
On the lock, click on these shapes in the following order:

- Crab
- Anchor
- Pirate Ship Flag
- Heart
It unlocks with a click, revealing another puzzle. The second puzzle requires players to insert those two discs into the empty slots and rotate them. After inserting those two discs, you will now have four movable discs.
Drag and drop the smaller disc at the empty slot on the left and the larger disc on the right. Next, rotate all four discs until the shapes in both discs are arranged in the following order as shown in the screenshot below: (the hint for this puzzle can be found in the piece of paper next to the park info map on the park bench/mossy rock area. )

After rotating the discs to arrange the shapes, click on the middle button. The cartoon octopus will raise its tentacle and the cabinet unlocks.
Graham is shocked to find that there are no paper rolls. Worse, he discovers a spare bee smoker. There’s also a coin jar. Had he seen this cabinet and its contents before, he wouldn’t have had to work so hard obtaining a dime or crafting a makeshift bee smoker, Press and hold the spacebar to identify each item in the cabinet.

Go back to the toilets to inform the park ranger via the Apiary. To Graham’s surprise, the park ranger is nowhere to be found and there’s a key hanging from the toilet door knob. Take the park entrance/exit key.

Graham feels dizzy and hears the sound of whistles again. The sound of whistles stops all of a sudden. This time it’s for real. Hannah is in danger and only Graham can save her. Head straight to the watchtower. Go upstairs to check on the kid. She is nowhere to be found. Exit the watchtower, turn → to go to the park bench/map area. Graham discovers her footprints in the mud. She ran back to the cave!
Turn → again to move to the “Rock Path” and keep moving. It’s a long walk and Graham returns to the mine.
When you are in the mine, move ↑ when Graham is close to the tunnel. He shouts “Hannah” but there’s no response. Go → to enter the control room.
Inside the control room, there’s a television on the extreme left side and three monitors with 9 buttons each. Click on the television to find Hannah. You will see a wolf and the camera pans to a kid lying unconscious on the other side of the makeshift elevator. There’s a gas leak, which knocked out Hannah. The emergency systems detected the gas leak and went into automatic lockdown. Help Graham pull the gas out; you must solve three puzzles to do that.
The hints to solve the puzzles are shown on the large instruction manual on the wall, next to the television. Click on it to learn more about the puzzle. You must redirect the vents so that the system will get out of lockdown.
Click on the first monitor, “Section A”. Press the buttons to put the arrow-dot symbols on the screen in their right place. Once you have done that, press “Enter”. Here are the correct symbol patterns for each section:
1. Solution for the Section A puzzle:

2. Solution for Section B Puzzle:

3. Solution for Section A+B (The Final Puzzle):

Note: For each correct puzzle, the screen will show “Setup Initiated”. Solving all three puzzles will pull the gas out.
Next, click on the lever on the far right side to trap the wolves.
Exit the control room.
Move → to enter the area where Hannah is trapped. Cross the bridge to reach Hannah.
Back to the park, talk to Hannah, and click on all dialogue choices to finish the conversation. Now, use the key to unlock the “Info Booth door”. Press the spacebar to know the booth door. Take the “guard keys” from the info booth and use them to unlock the large park gate.
End of Chapter 4.
