Strange Antiquities: Full Walkthrough and Guide | Part 1 (Day 1-Day 5)
There’s something about stepping into an old antique store. That surreal, suspended-in-time feeling! You never know whether you will stumble upon a mysterious ancient relic, or maybe even something a little… cursed.
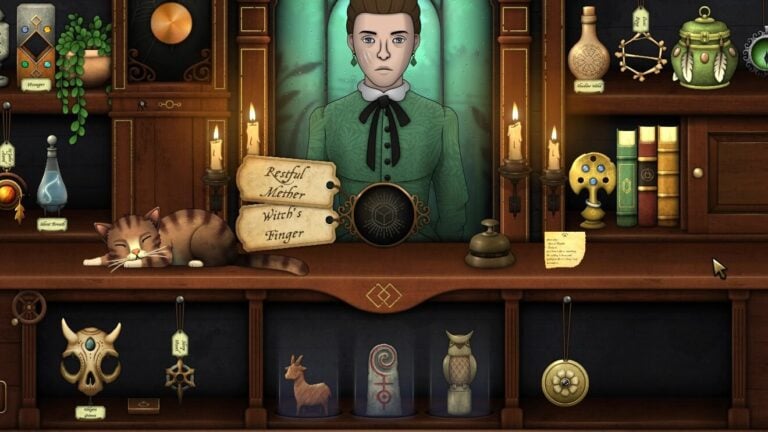
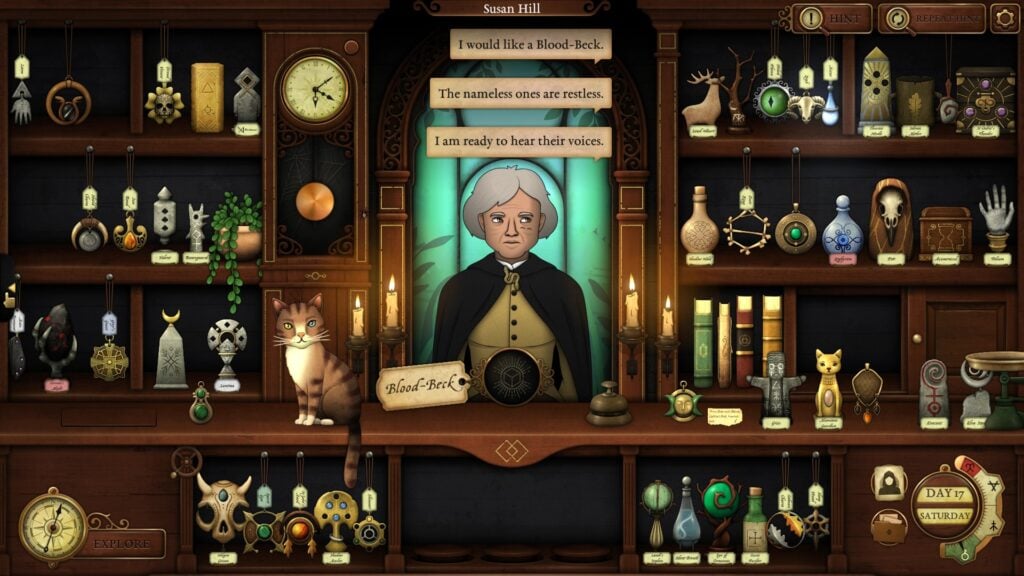
Now imagine owning a shop dealing with such objects. You are the one behind the counter, selling oddities no one else dares to touch. Mysterious townsfolk visit your store, each with secrets heavier than the objects they buy. In Strange Antiquities, you are not a mere seller, but an “Apprentice Thaumaturge” who has a sharp eye and knows what the townsfolk of Undermere need for their arcane practices.
Every day, new customers visit your store with their unpredictable needs and stories. Identify and examine the items they want. Use catalogues to go deeper into the lore behind the mysterious items. Find hints in the strange artefacts book and the book of symbology to identify them. Acquire clue cards and explore old maps to retrieve mysterious artefacts.
If you have played Strange Horticulture, you’ll already feel right at home with the mechanics. It’s a shopkeeper-style game built around riddles and puzzles. Each time a visitor steps into your store, they share a piece of their story. Your job is to read the dialogues carefully, consult your catalogues, and piece together the clues. By cross-referencing their description with the information in your books, you must deduce the correct item to give them.
Strange Antiquities is pretty long, and honestly, so is this guide. So I have broken it into multiple parts to make it easier to read and less overwhelming. Alright, enough buildup! Let’s dive in and uncover the weird objects this shop is hiding with our walkthrough:
Series: The Strange Antiquities Walkthrough [Part 1] Current | [Part 2]| [Part 3] | [Part 4]
Quick Access
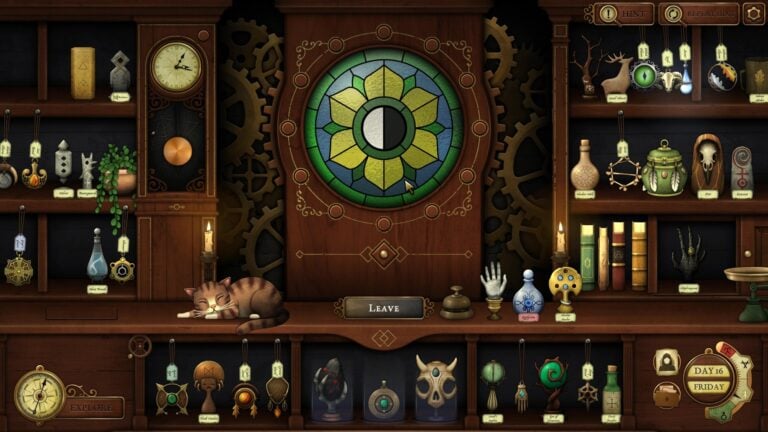
How to Play
1. Press the desk bell to call a visitor. To know more about a new visitor, click on the visitor card in the lower-right corner of the screen.
2. Pay close attention to the dialogue to understand a visitor’s problem and the item they’re searching for. Right-click on the screen to progress through the conversation. In most cases, visitors will explicitly mention the item’s name while speaking with you.
3. The first visitor is Eli White, the owner of the shop. He hands over the Strange Artefacts book for reference purposes. With the book’s help, you will find important hints about the objects described by the visitors. The index at the back of the book may be of immense help if you can’t find the item’s name in the contents.
4. Use the arrow keys or WASD to move around your shop. Left-click on an object, then hold and drag it to move it wherever you need.
5. From the reference books like “Strange Artefacts”, you will find crucial hints about a particular object that will help you inspect it through four different options. 6. To read a reference material, right-click on it to open it. Click on the item’s name under “Contents” to learn more about it. The item description provides hints to help you inspect the item:
6. Right-click on an object to inspect it. In the inspection screen, you can examine its color, composition, and other physical characteristics in greater detail; some of them will be hinted at in the item description page in the Strange Artifacts book. There are four ways to interact with an object and learn more about it. First, select a category from the panel on the right. Then move your cursor over different parts of the object to examine them more closely:
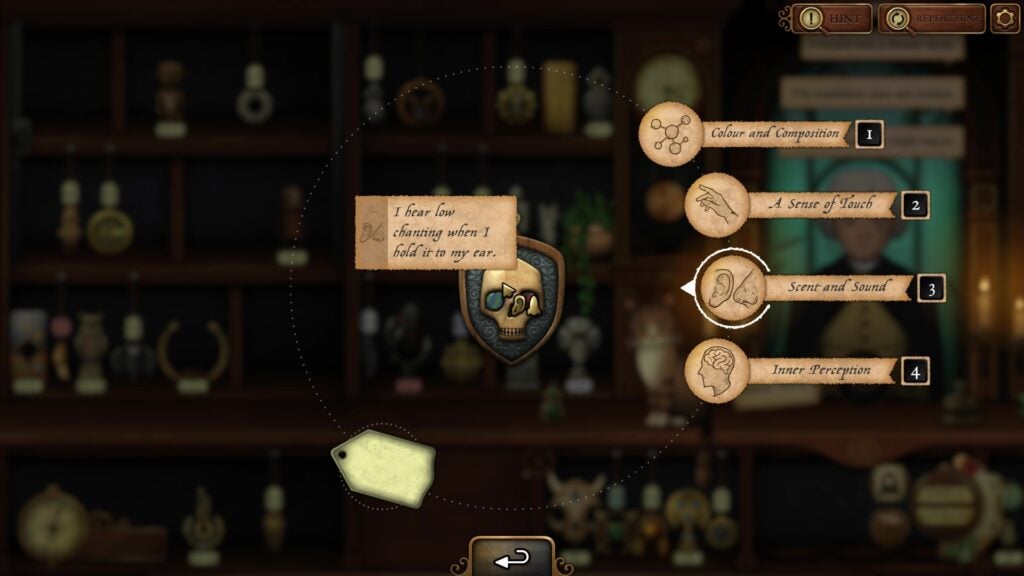
a. Color and Composition: Click on this category and then move the mouse cursor over an object know its exact color and material.
b. A Sense of Touch: Lets you know how smooth or hard it is. Can also recognize certain patterns.
c. Scent and Sound: Let you know how it smells or sounds.
d. Inner Perception: This ability allows you to sense the aura surrounding an item. Through it, you can detect whether an object radiates dread, power, happiness, melancholy, or some other lingering emotion.
7. Once you have correctly identified an item, drag and drop it to the empty slot below the customer and click on “Use Item”. If the customer accepts it, you discover new artefact pages that will be added to the Strange Artefact book.
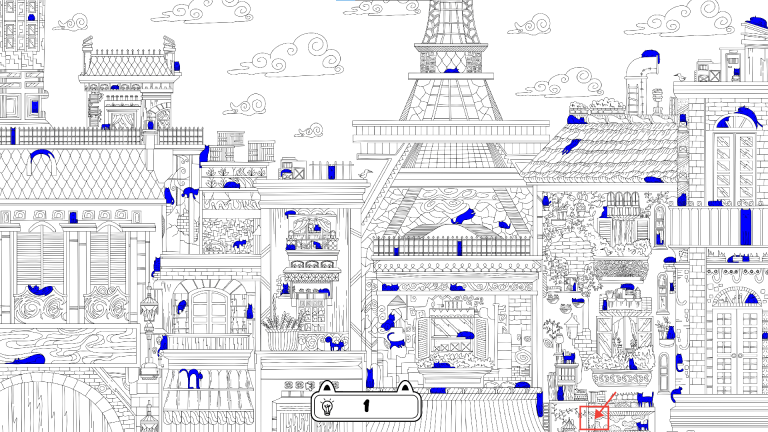
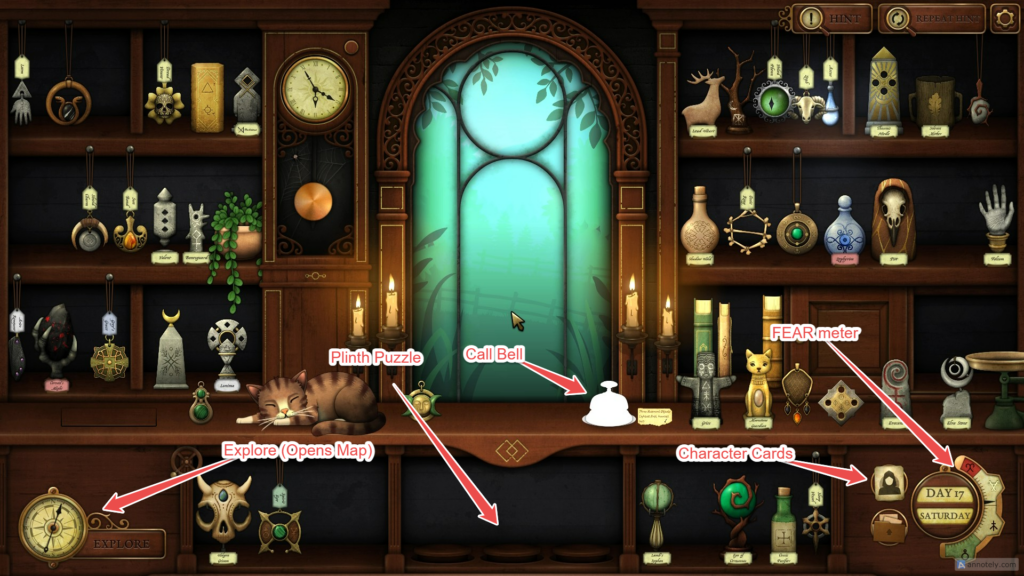
8. Click on the “Explore” button in the lower-left corner of the screen to bring up the map. As you progress, you will unlock 3 maps that will help you in finding new artefacts. The clue cards you get at the end of a day and the letters from the mailman provide valuable hints on finding new artefacts.
8. Putting the wrong item in the slot increases the FEAR meter. You can find it at the bottom-right corner of the screen. Every time you place a wrong item, the fear meter increases. Once it hits the red zone, or the danger zone, you have no other option but to break the hold it has over you. To do this, a dice-based minigame will appear on the screen, challenging you to dispel it.
How to Play the Dice Mini Game
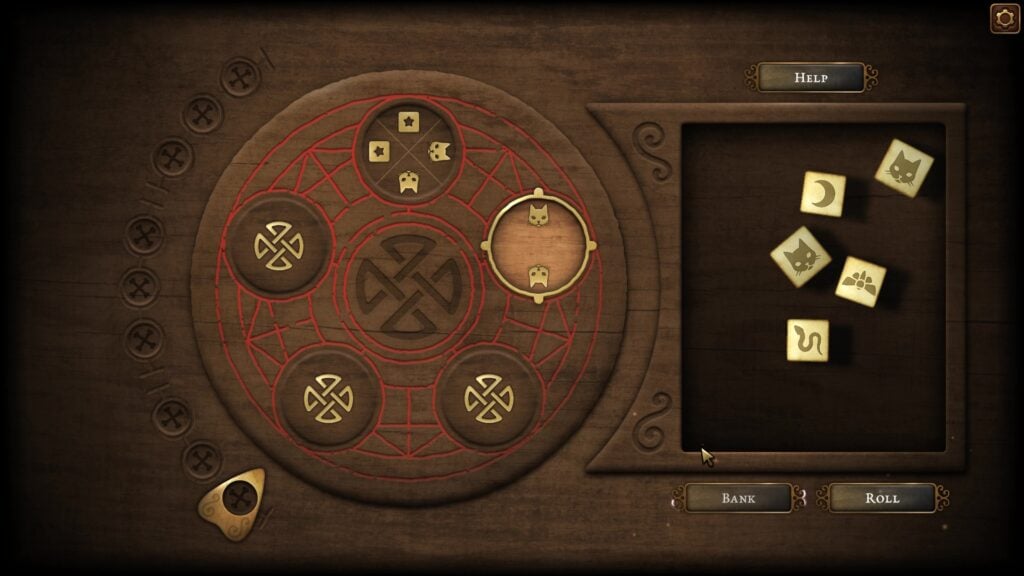
1. As soon as the fear meter maxes out and hits the red zone, a new dice game appears on the screen. This peculiar little circular board features various symbols carved into three or more smaller discs or seals, arranged in a triangular pattern. There will be six dice placed next to the board.
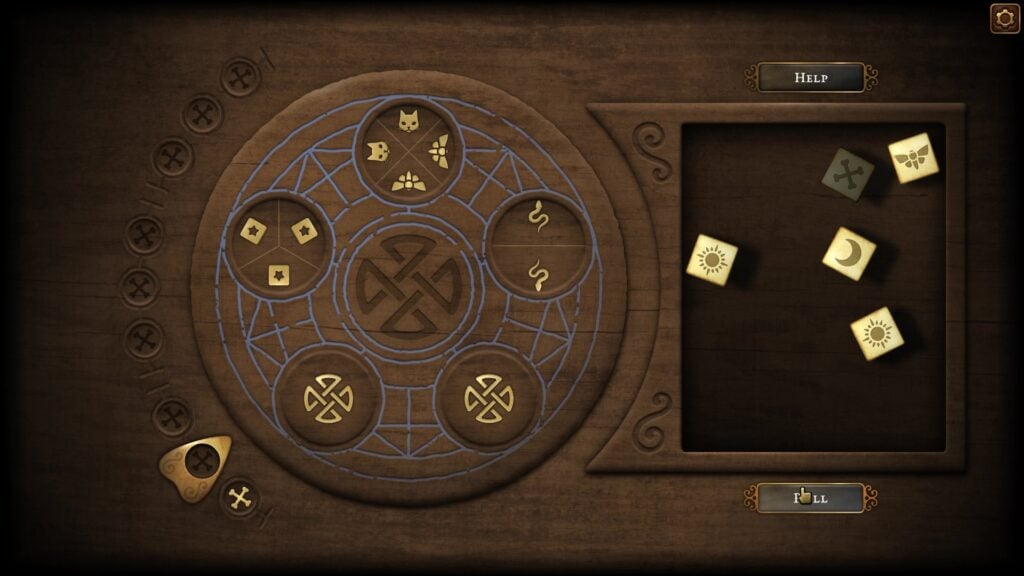
2. Your goal is to break all seals. Roll the dice to match the symbols on the dice to the symbols carved into the seals to break them one by one.
3. If the dice match the symbols on one or more seals, the seals will glow. Click on the seals and press the bank button to break them. If you break all seals, you will dispel your fear and can resume selling objects to your customer.
4. Stars are wild and can be any matching symbol. They can be any symbol as long as they are all the same.
5. You can also lock dice if you spot a potential match.
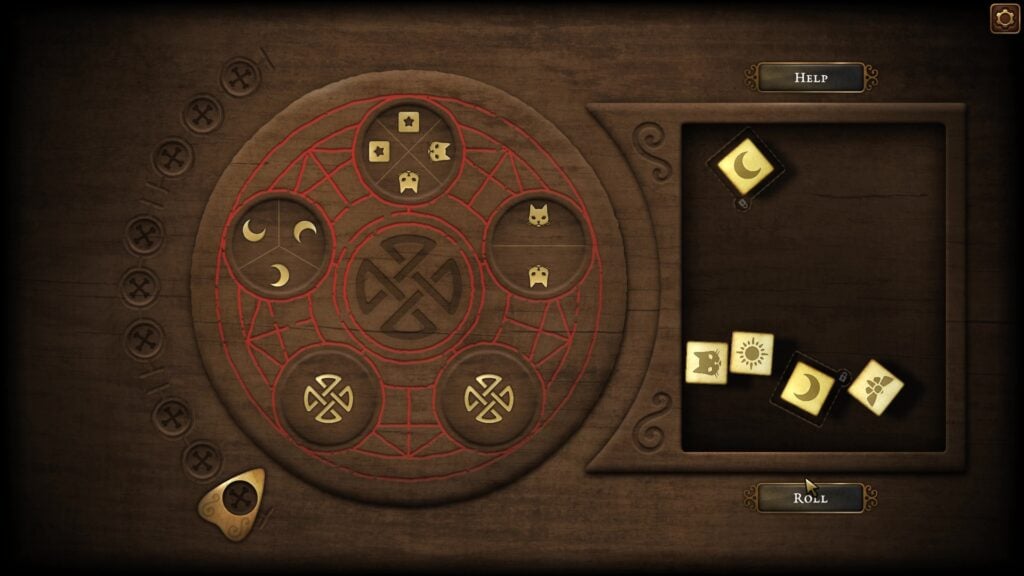
6. For example, A seal shows two snake symbols and one cat symbol. After your first roll, you get two dice displaying snake symbols. That means you only need one cat symbol to complete the pattern. In this case, lock the two dice with the matching snake symbols. When you roll again, only the remaining unlocked dice will roll, giving you a high probability chance to land the cat symbol you need.
7. You begin with nine health points, represented by the crossbones symbol. Each time you roll a die that lands on a crossbones, you lose one health point. Lose all nine, and it’s game over. You will have to start the challenge from scratch. Successfully banking a seal restores your health points.
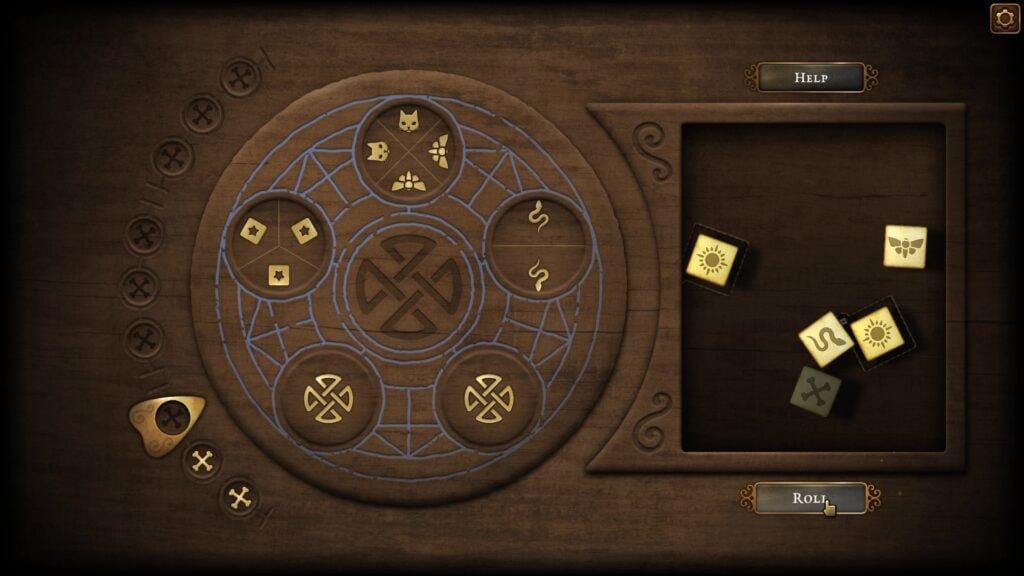
8. However, there’s a catch: if you lose three health points during a round, any dice you’ve locked will automatically be released. And if you bank a seal after losing those three points, your health won’t reset all the way back to the beginning.
9. If you land on two or more crossbones in a single roll, your pet cat swoops in to save the day. It rerolls those dice for you, essentially giving you a second chance and a free life you definitely didn’t expect.
Day 1
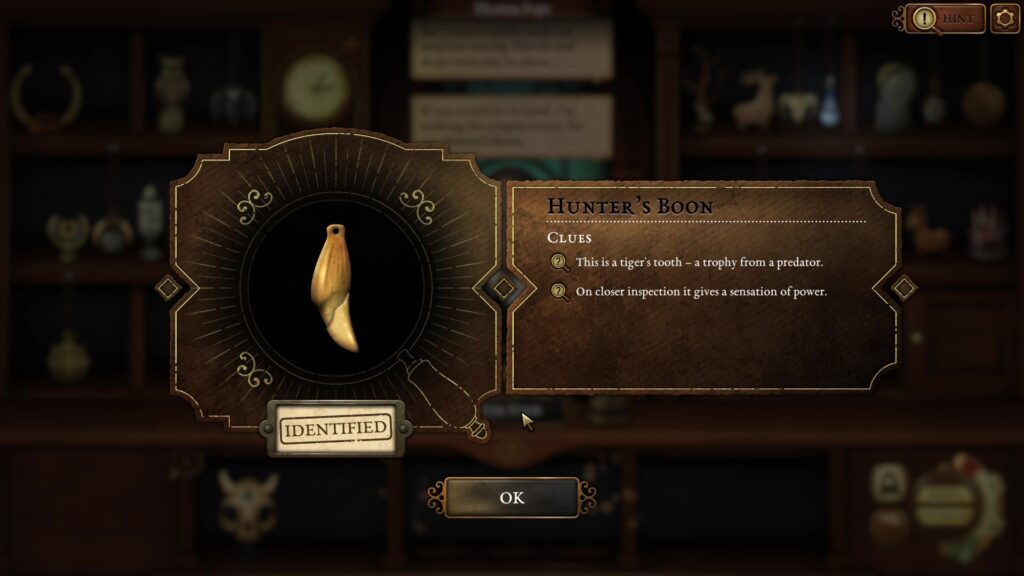
Hunter’s Boon
Made from trophies taken from the deadliest predators. Simple items without embellishments:
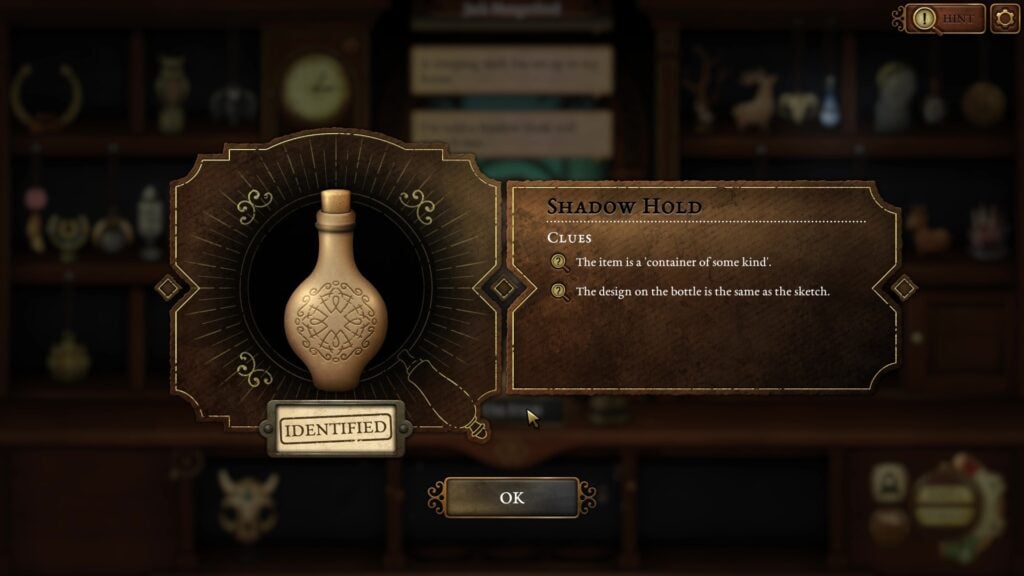
Shadow Hold
An Oshadic vessel decorated with an elaborate design called a shadow catcher. The shadow catcher design is displayed on this page:
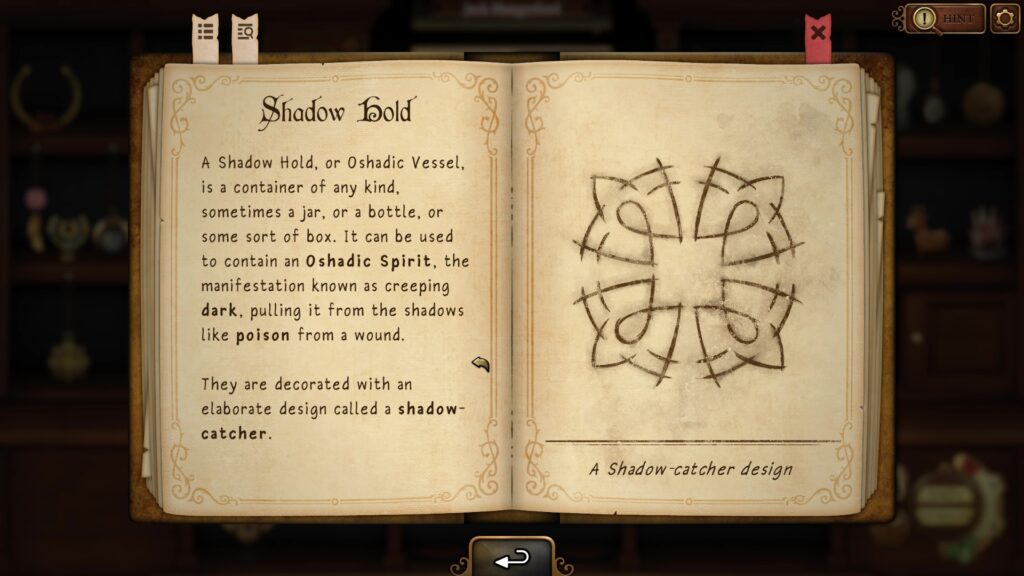
A Shadow Hold:
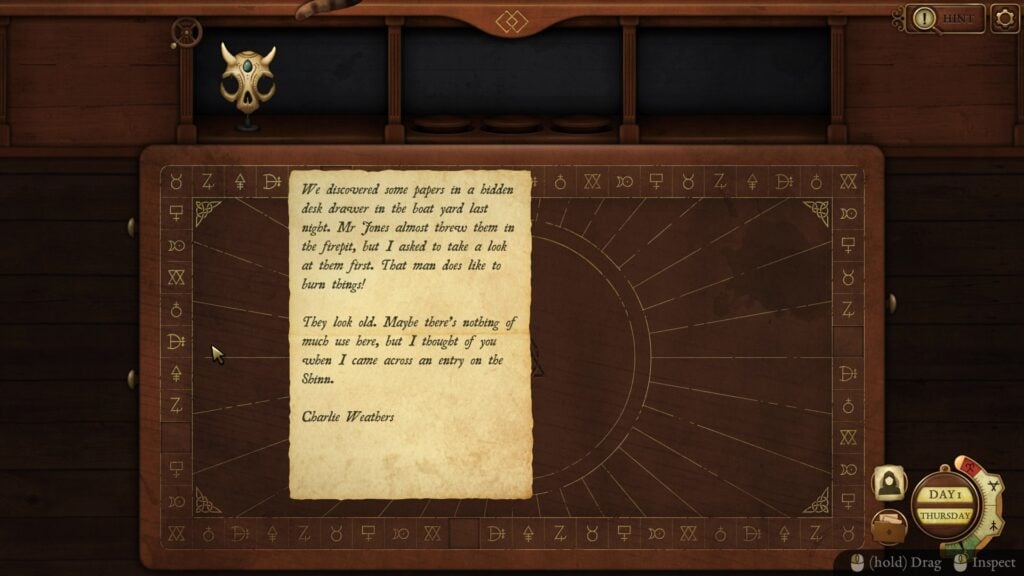
Letter from Charlie Weathers
David Chafer, the mailman, delivers the first letter to you. Open the envelope to read the letter from Charlie Weathers. It’s a location clue to a lost item hidden somewhere in Undermere. Find the location on the map, and you will obtain certain items of interest. Drag and drop the letter at the bottom of the screen to put it on top of the desk. Letters and clue cards go here.
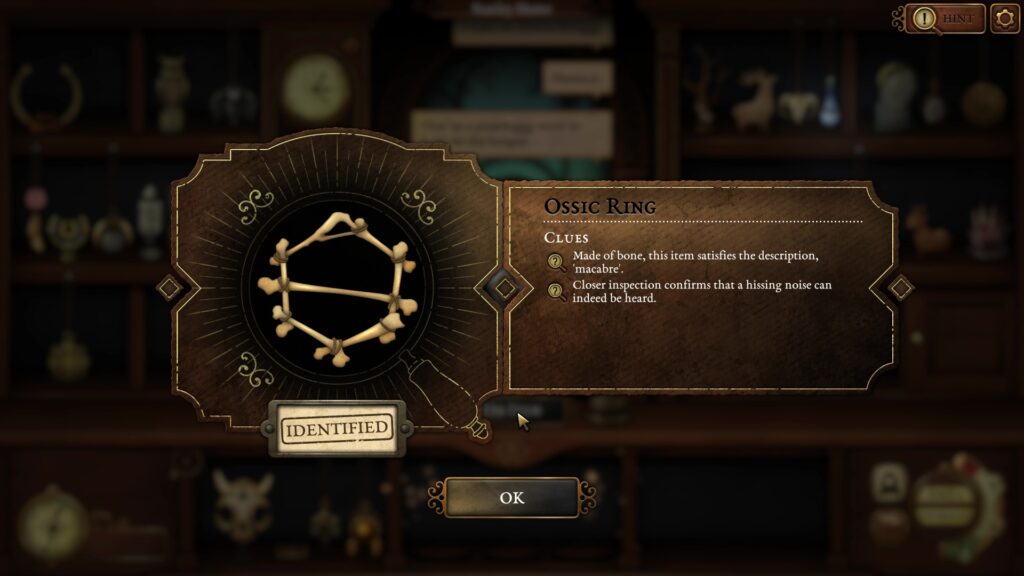
Ossic Ring
You can hear Corchen, the serpent goddess’s unearthly hiss when you hold the Ossic Ring up to your ear.
Right-click to examine the Ossic Ring. Choose “Scent and Sound” and place the mouse cursor on the item to listen to a soft hissing sound.
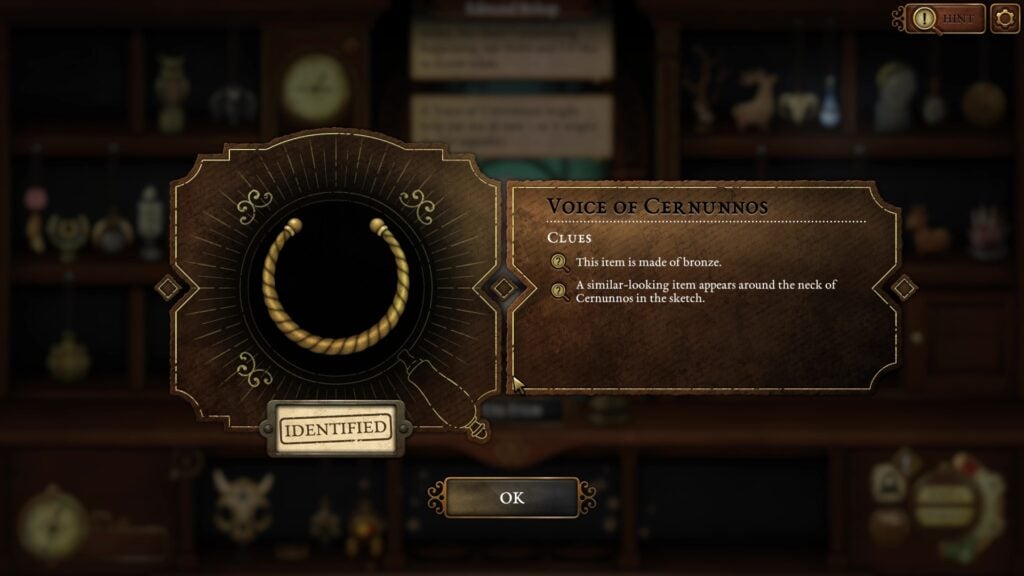
Voice of Cernunnos
It’s a bronze torc, as you can see in the picture below, where Cernunnos is depicted wearing it around his neck.
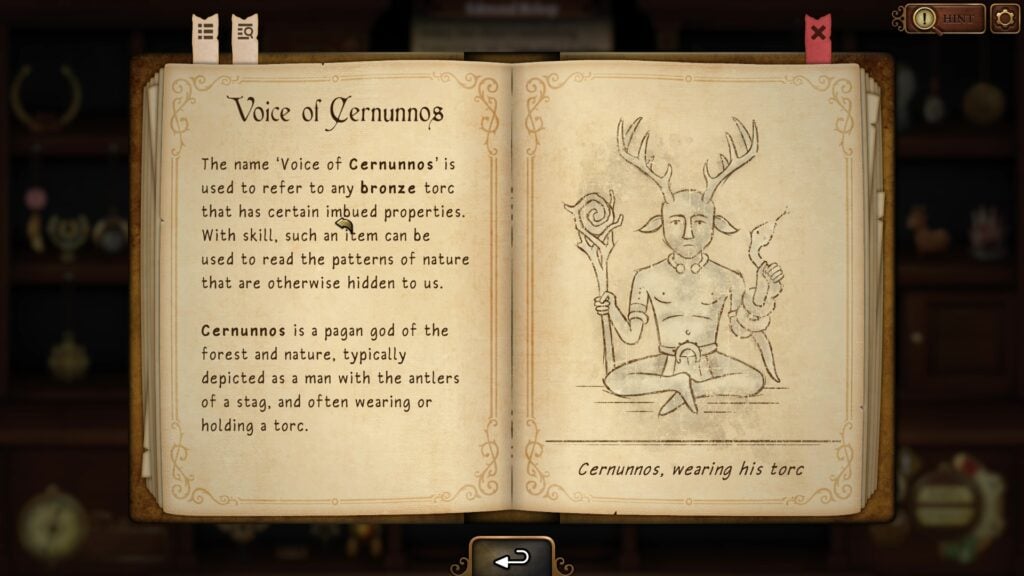
In Strange Antiquities, this is how the Voice of Cernunnos looks:
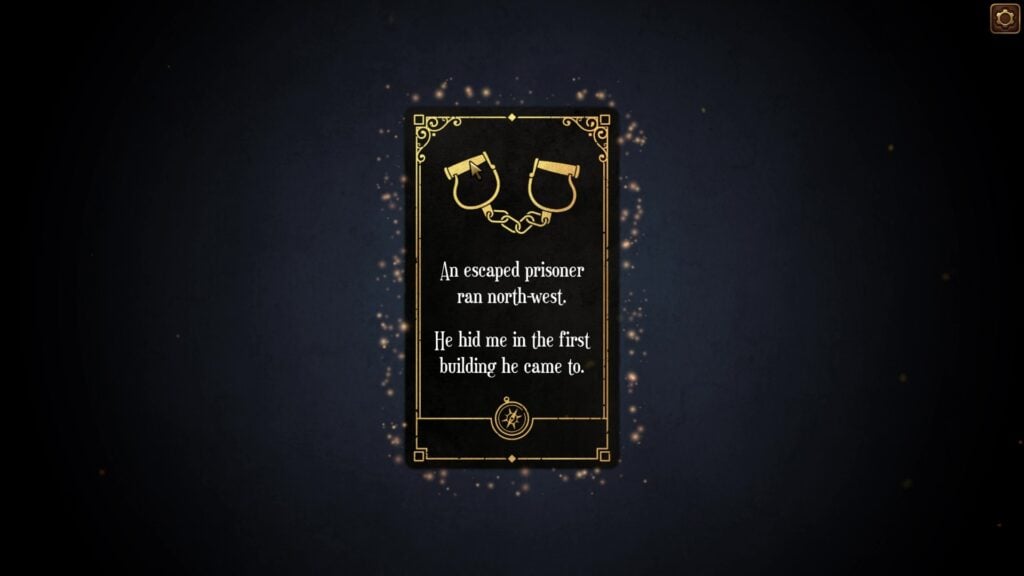
End of Day 1. Click, hold, and drag the mouse along the dots to unlock the first clue card – An Escaped Prisoner. At the end of each in-game day, you will unlock new clue cards that will help you discover secret locations on the map and the items hidden within them.
Day 2
Book of Symbols
Verona Green, the Occult Scholar, returns the Hermetic Symbology which she borrowed from Eli. This book, in conjunction with the Strange Artefacts book, can be used to identify certain items. It contains planetary, astrological, and occult symbols.
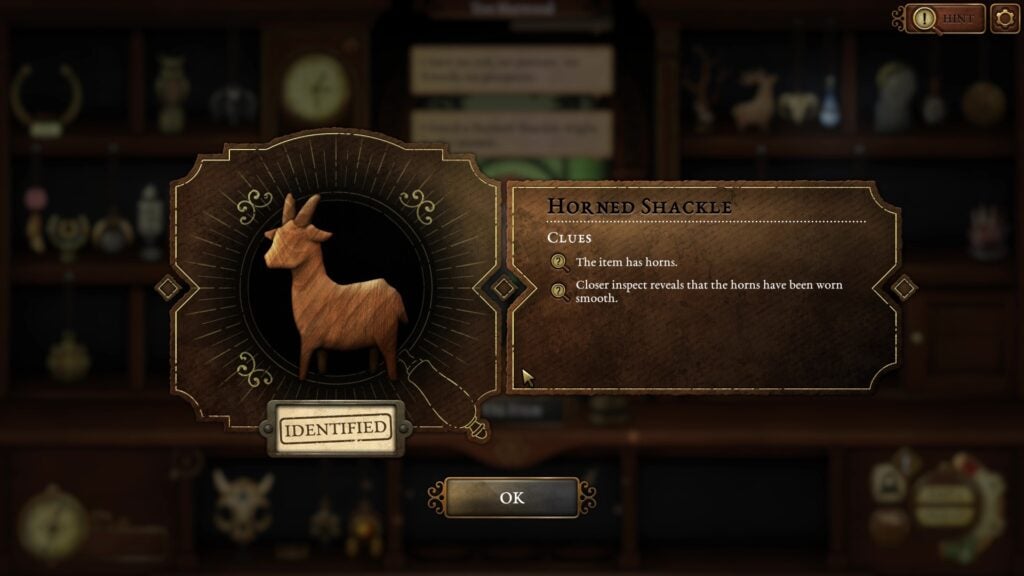
Horned Shackle
The horns are rubbed between fingers, causing them to become worn smooth.
Right-click on the goat figurine to inspect. Choose “A sense of Touch” and move the cursor over the horns. That part will feel smooth.
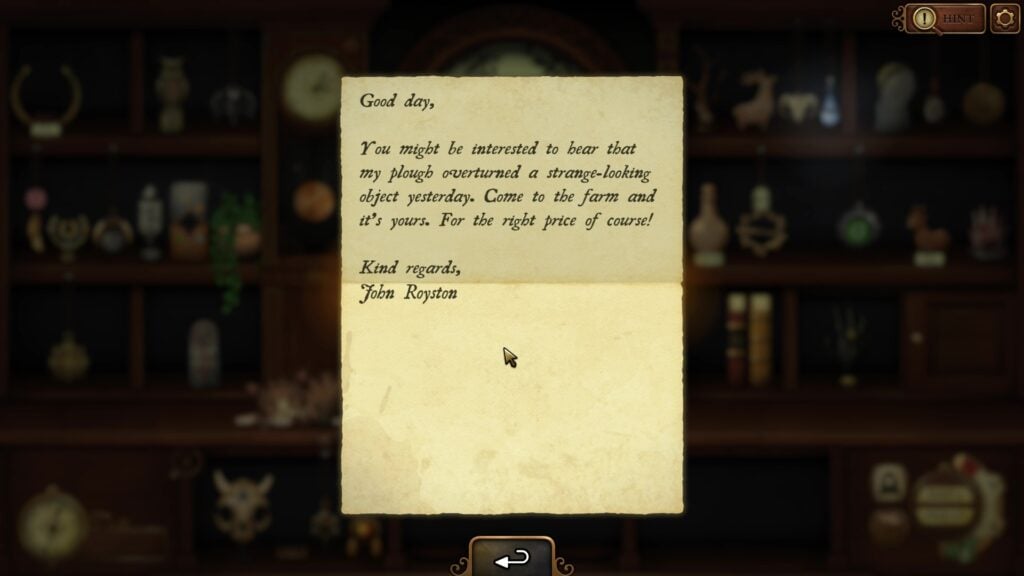
Letter from John Royston
David Chafer returns with another letter:
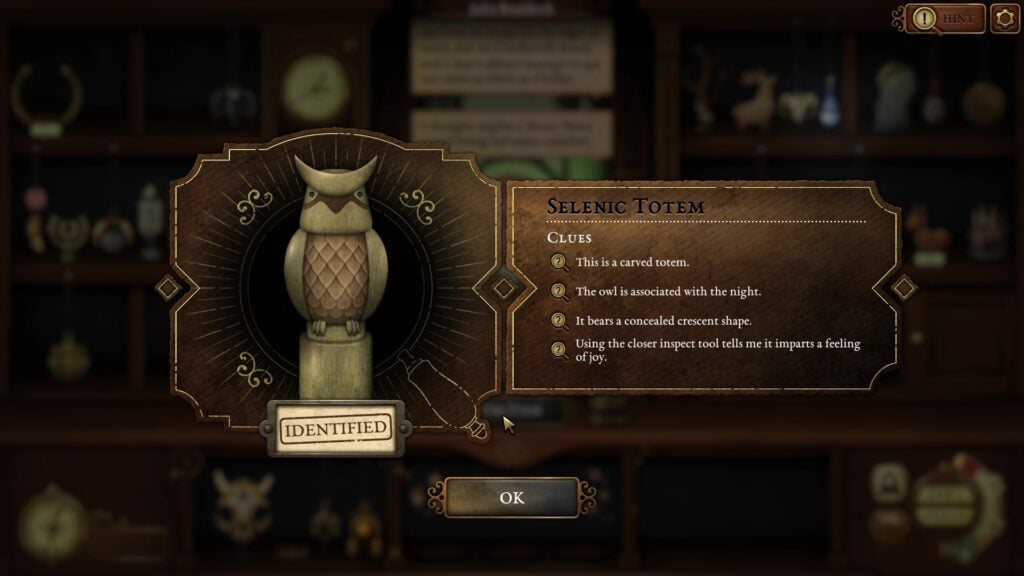
Selenic Totem
The item name will be missing. But Julia Braddock gives a hint – It’s a Moon Heart. For items with missing names, use the Index in the Strange Artefacts book to look for hints mentioned by people.
Open the book and click on the magnifying glass icon, displayed as a bookmark in the top-left corner, to access the Index at the back. Turn the pages to find “Moon Heart” in the index. You will see the name of the item listed next to it: Selenic Totem. Click on it to open that page.
Touching a Selenic Totem will fill your hearts with love or joy. They feature crescent shapes and have some connection to the moon or night.
Binding Seed and Zhea
Give one of these two items to Daisy Winters. The item you give to her will affect the events outside the shop and may affect the game’s ending.
Binding Seed
A binding seed is made out of two different materials, representing the Mentic and the Wycix, the mind and the body. The item is often described as a spiral encompassing the seed (body).
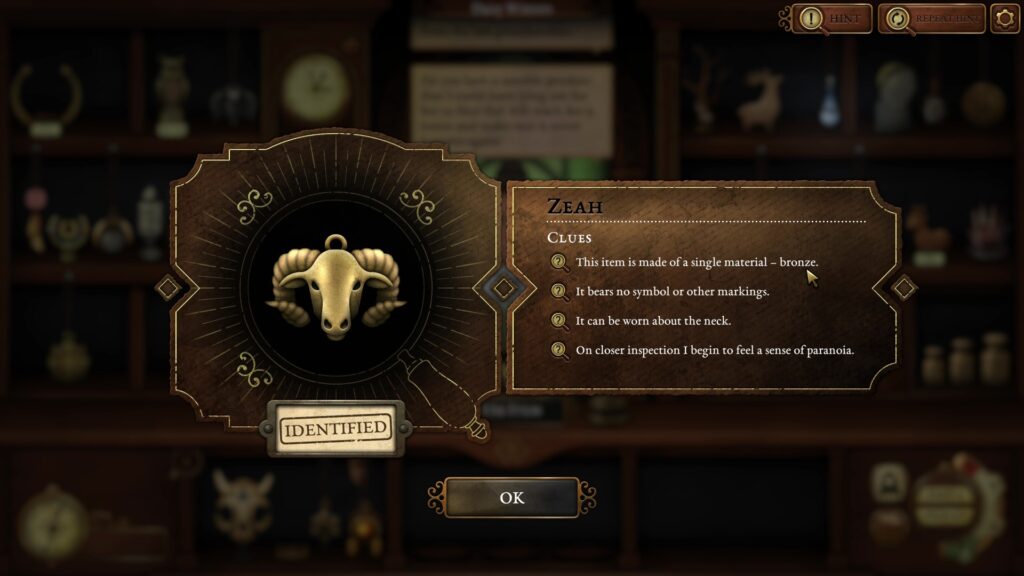
Zhea
Zhea is worn around the neck – A pendant of some kind. Touching it will instill a sense of fear and paranoia. It is made of a single material, except wood or clay. It doesn’t have any symbols or writings.
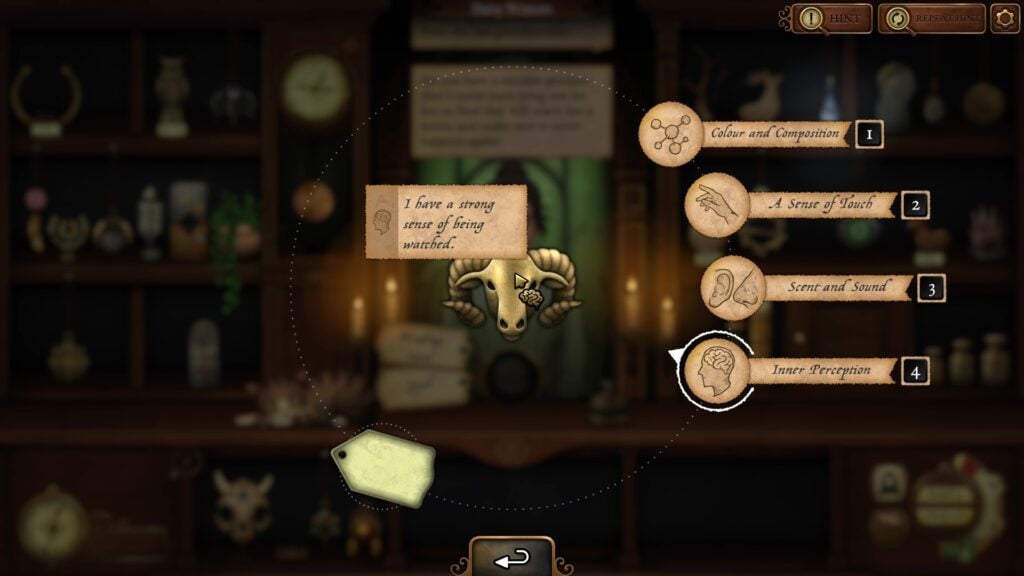
Inspect the Ram-shaped pendant. Choose Inner Perception and then touch the pendant to get a strong sense of being watched.
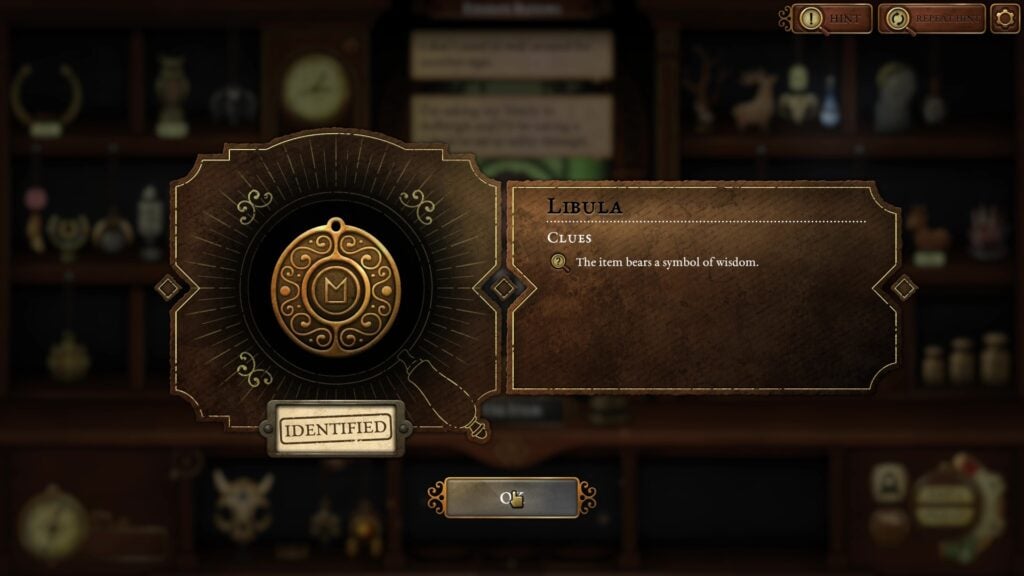
Libula
Open the Strange Artefacts book and search for this item. Hint: The imbuement of Wisdom. Open the book of symbols (Hermetic Symbology) and under Imbuements, look for the symbol associated with the word Wisdom. One of the items in your shop has this symbol.
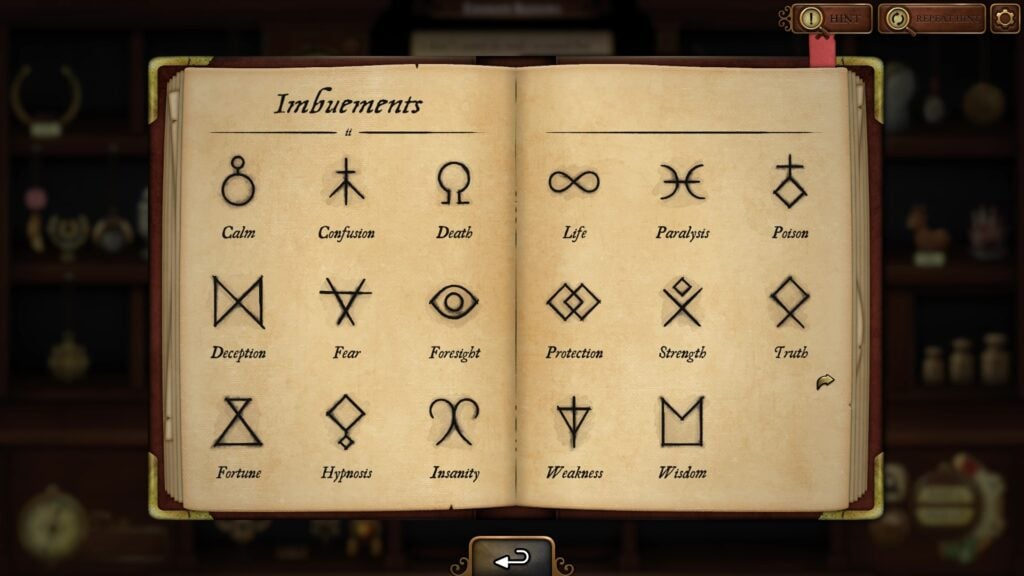
Behold, the Libula:
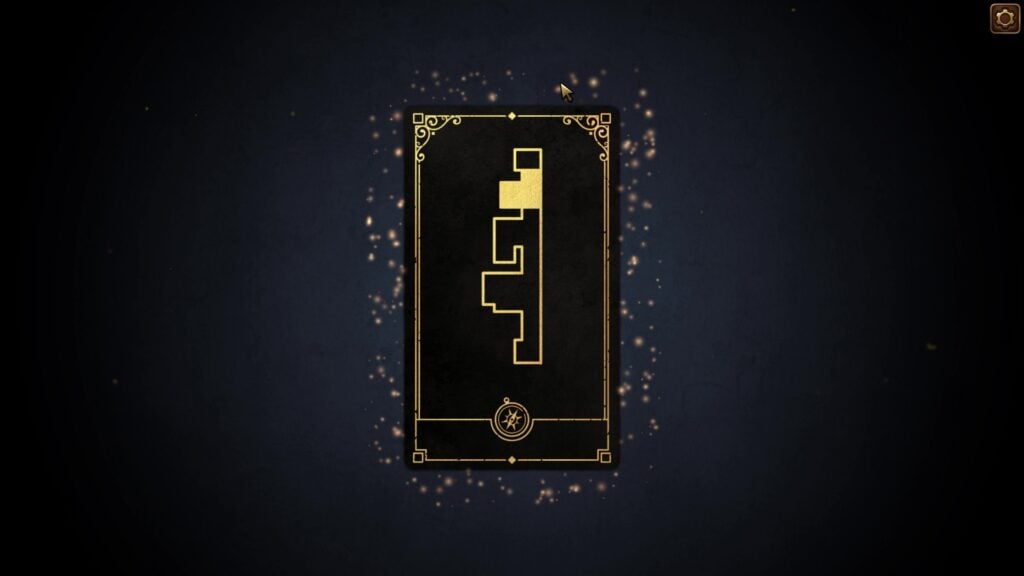
End of Day 2. New clue card showing an outline of some buildings.
Day 3
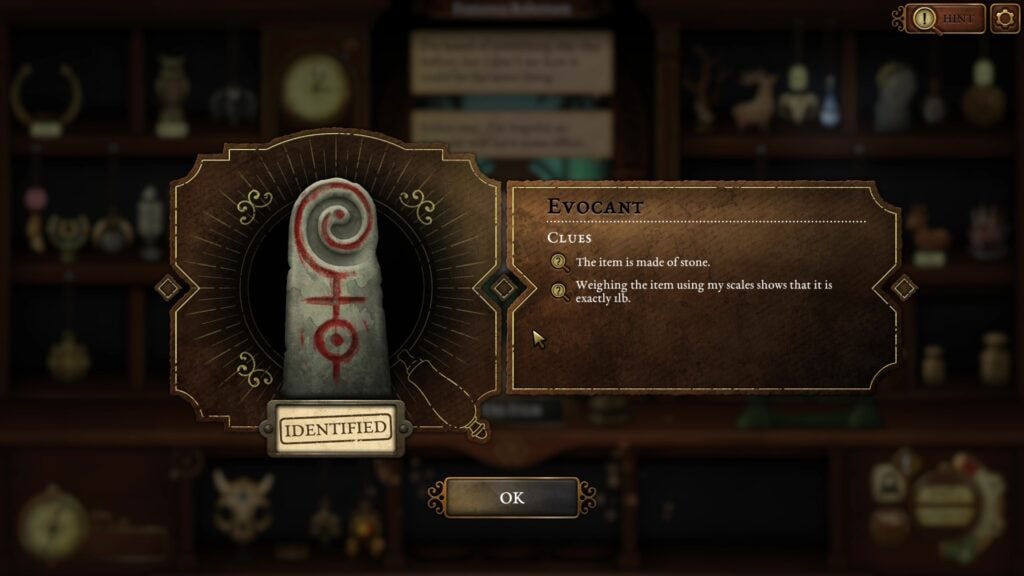
Evocant
A stone item weighing the same as a man’s heart. It weighs exactly 1lb.
Use the balance scale to weigh the item. Slide the compartment to find all 3 weights. Put the 1lb on one of the two pans of the balance scale. You can weigh all items 1 by 1 by placing them on the second pan. One of them should weigh exactly 1lb.
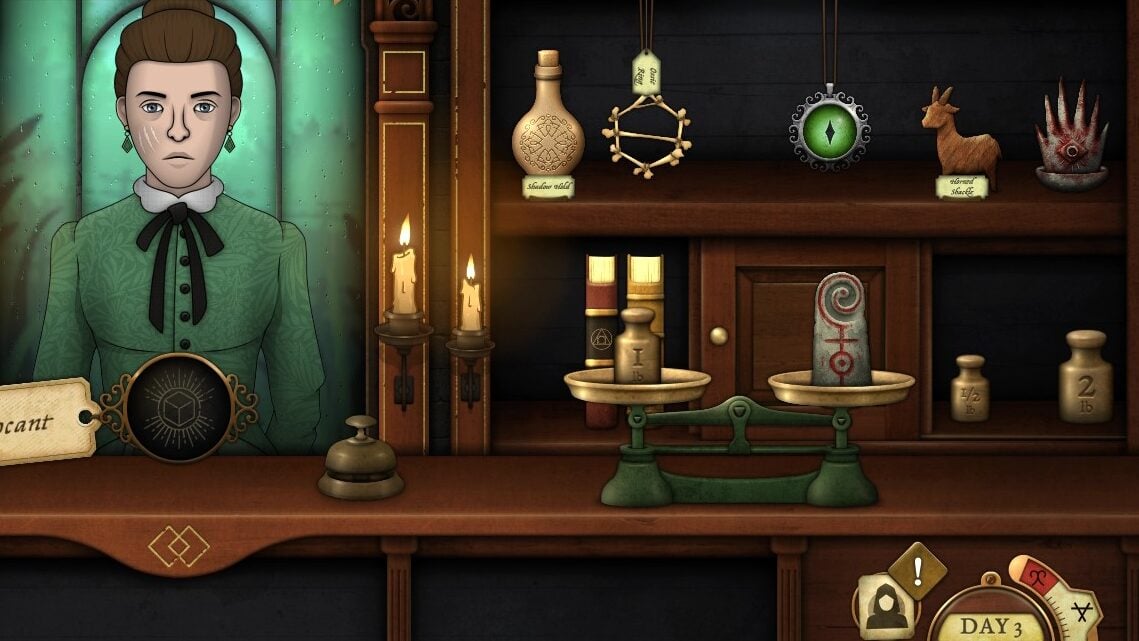
Here’s the correctly identified item:
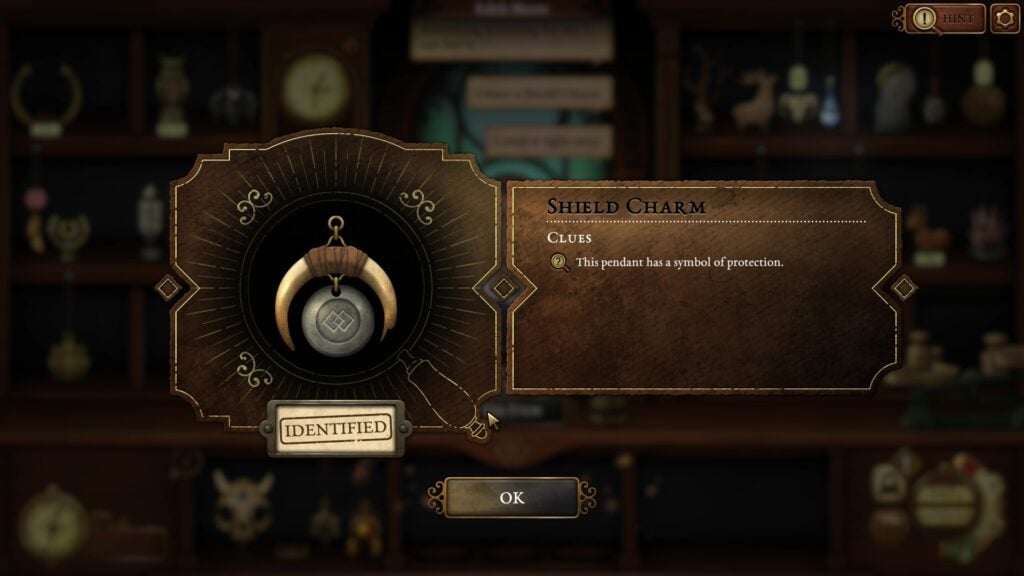
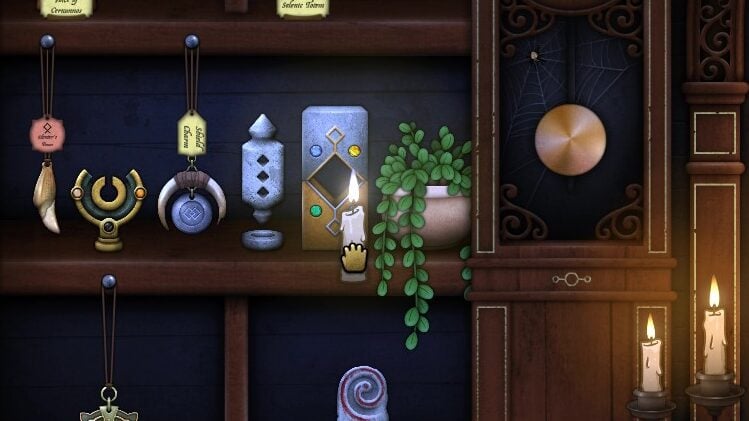
Shield Charm
A generic charm of Protection can be made from a variety of materials, although rarely from precious metals.
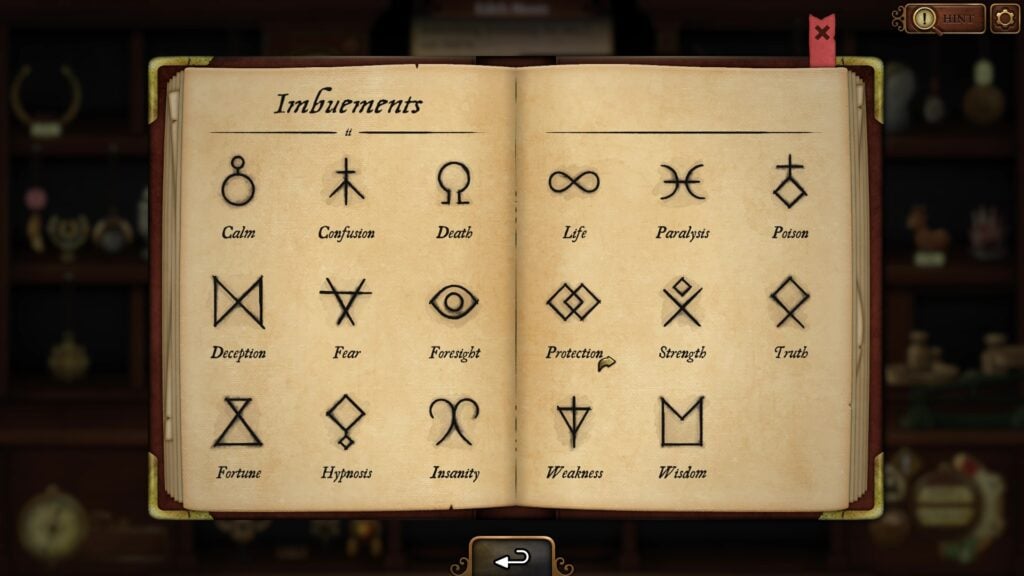
Look for the symbol associated with Protection in the book of symbols under Imbuements. Find the item with the same symbol in your shop.
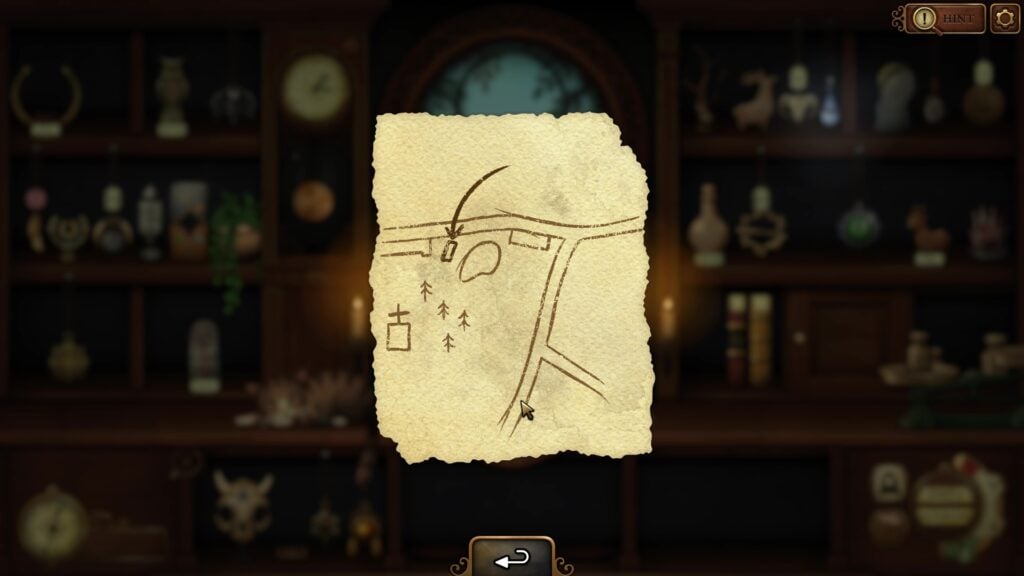
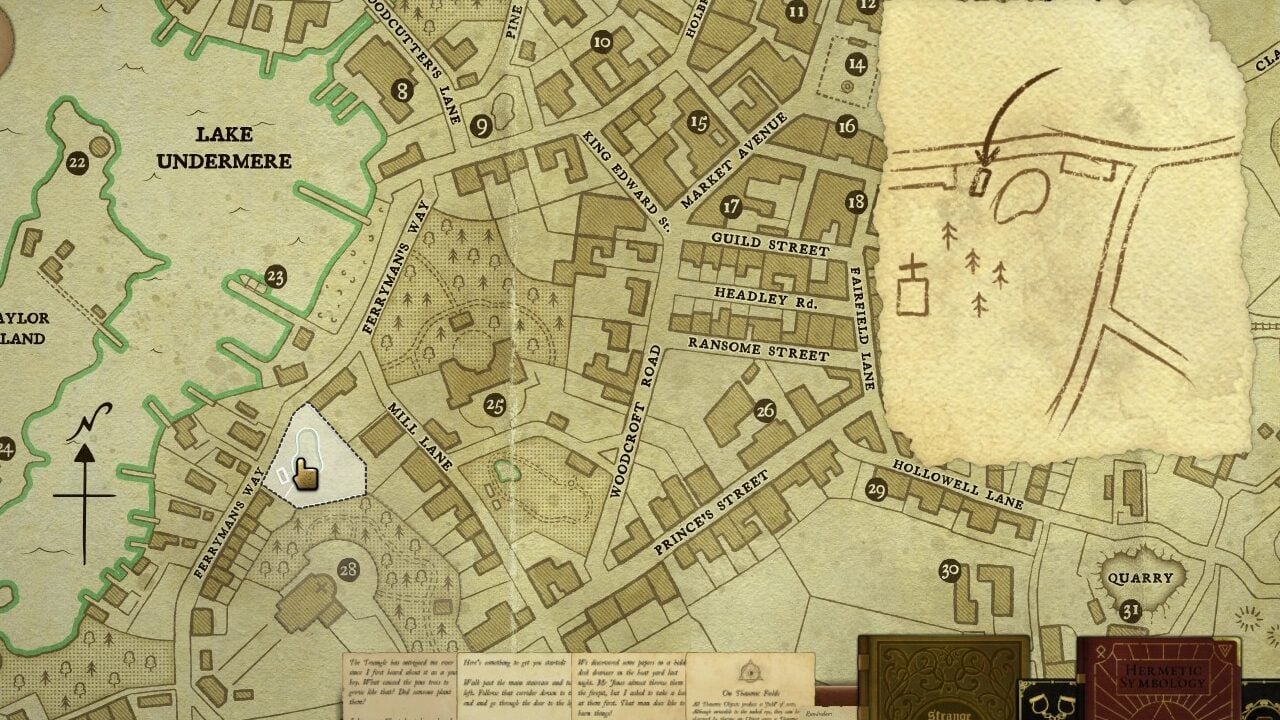
Map on a Piece of Paper
Hugh Langston draws a quick map on a small piece of paper and gives it to you. A location clue to find a strange, cursed item.
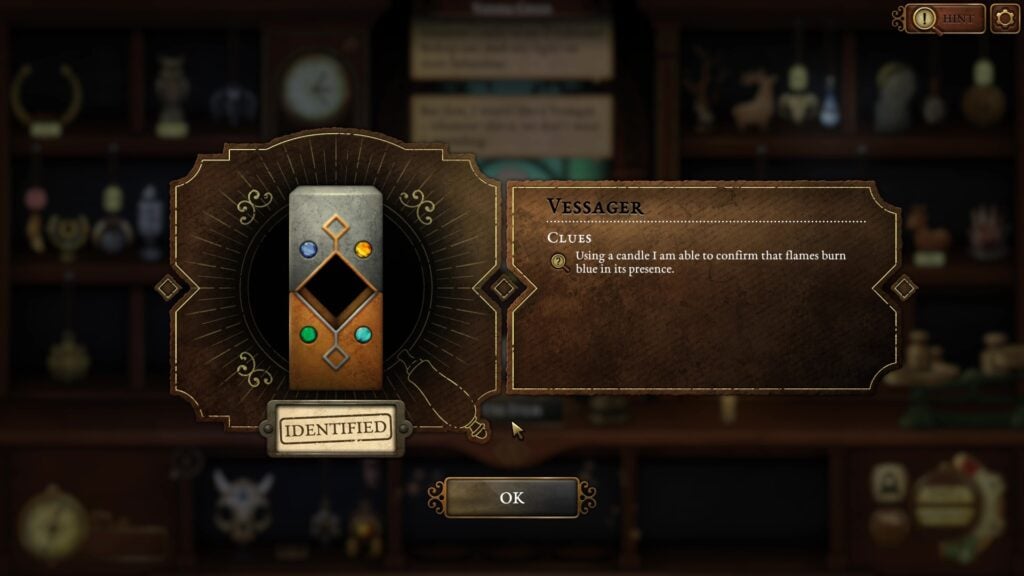
Vessager
Used to prevent the spread of disease and pestilence. One peculiar characteristic of this oddity is that flames turn pale blue in their presence.
Click and hold the left mouse button on a candle, then drag it near each item. The candle’s flame will turn pale blue when it’s next to the correct item.
Here’s the correct identification of the Vessager:
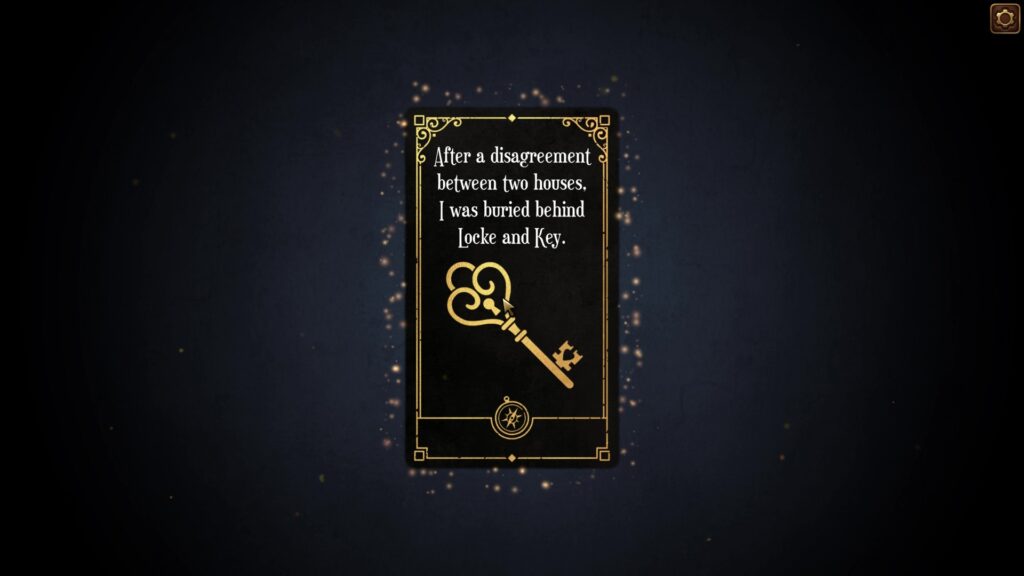
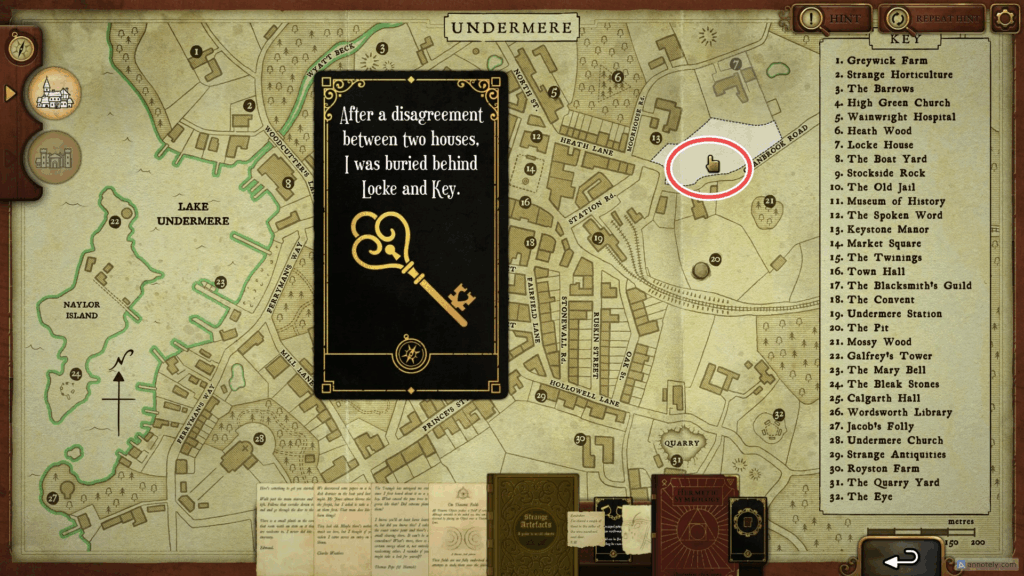
End of Day 3. Third clue card. It reads:
After a disagreement between two houses, I was buried behind Locke and Key. Locke is spelled differently. Location hint can be found on the map.
Day 4
Eli White gave an interesting trinket that he found in Ravenglass.
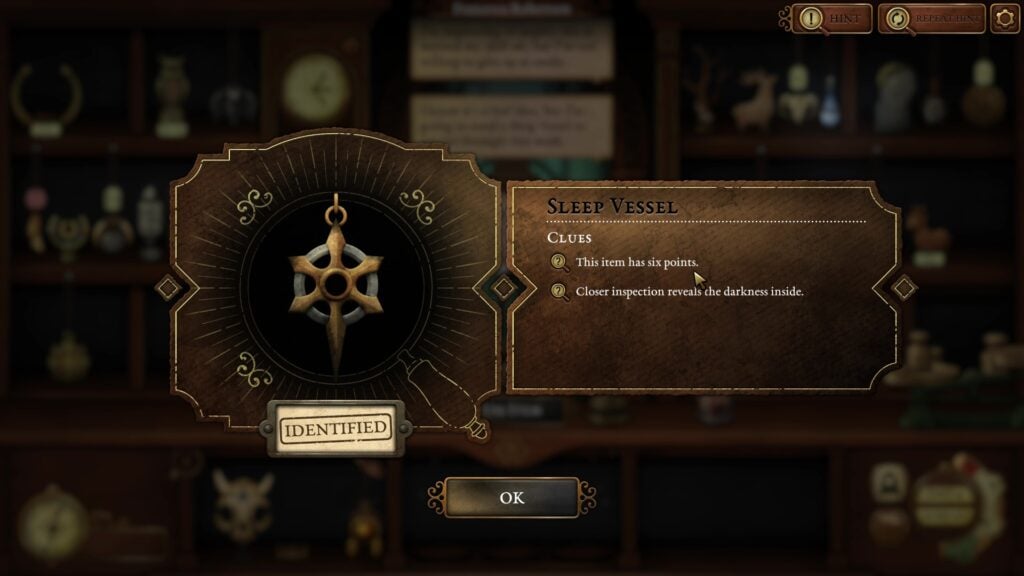
Sleep Vessel
It’s a six-pointed item. You will find it inside the right-hand drawer of the desk. Make sure you pick it up from the drawer on Day 1.
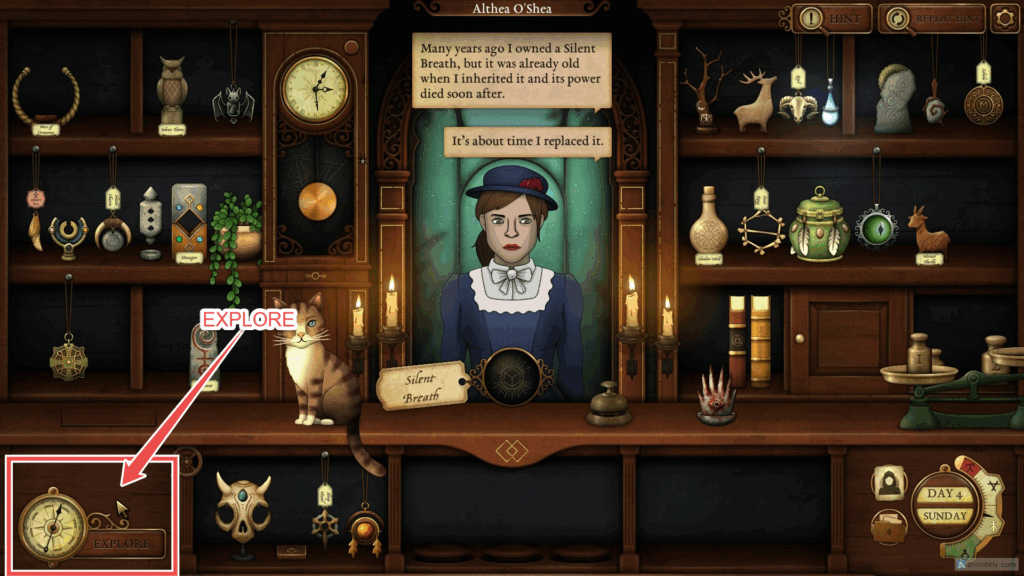
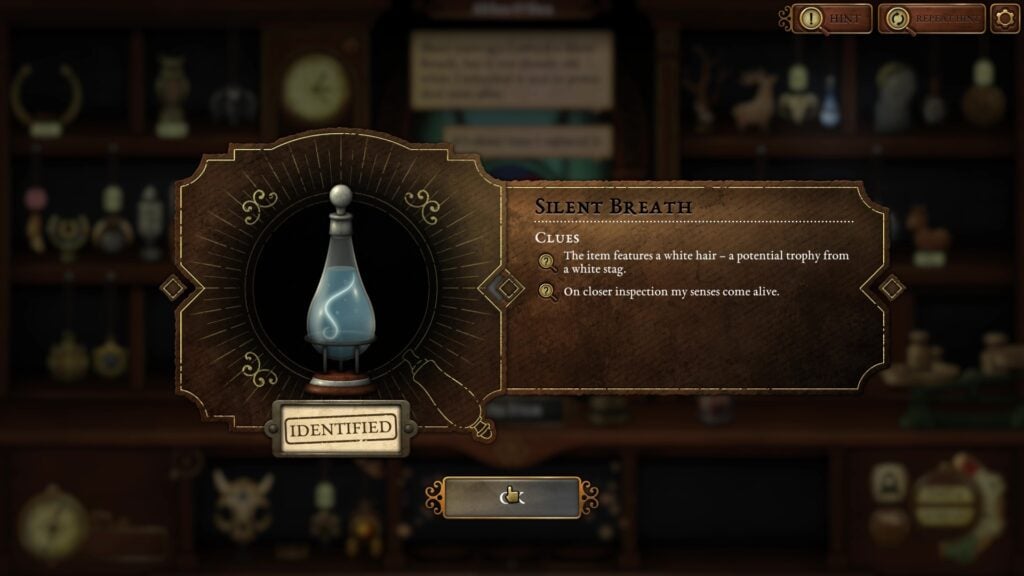
Silent Breath
A bottle that contains a small token taken from a living white stag.
Look through letters and clue cards to see if you find anything. To find this item, take the help of the clue card that has the outline of some buildings. You will unlock it at the end of day 2.
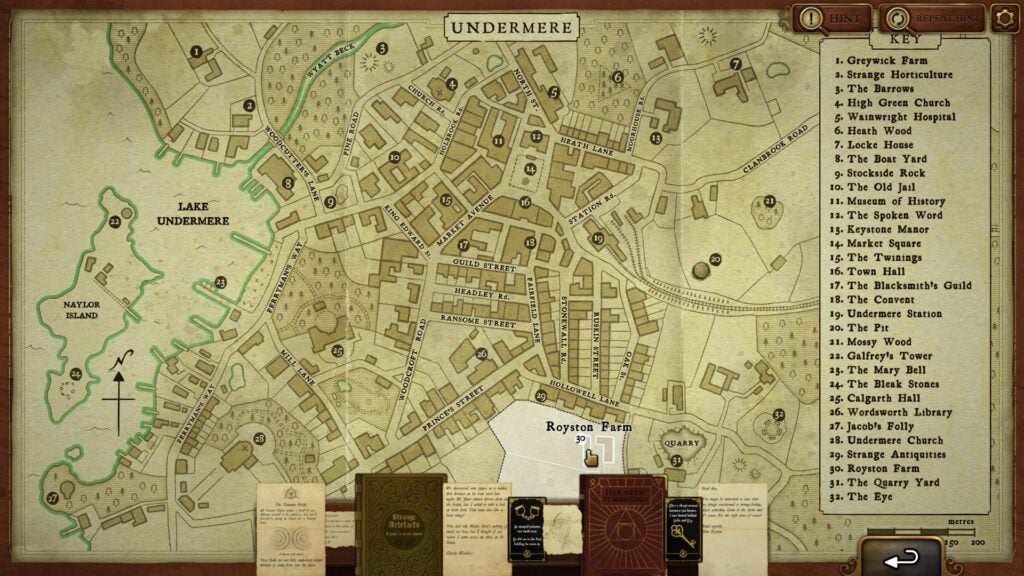
Click on the down arrow button to reach your study desk. If you haven’t done so yet, then open the right-hand side drawer of the desk to get the map. This will unlock “Explore”.
Click on the Explore button in the lower left corner of the screen to view the map. Place the clue card beside the map and search same outline of buildings on the map. You will find the same buildings along Princes Street:
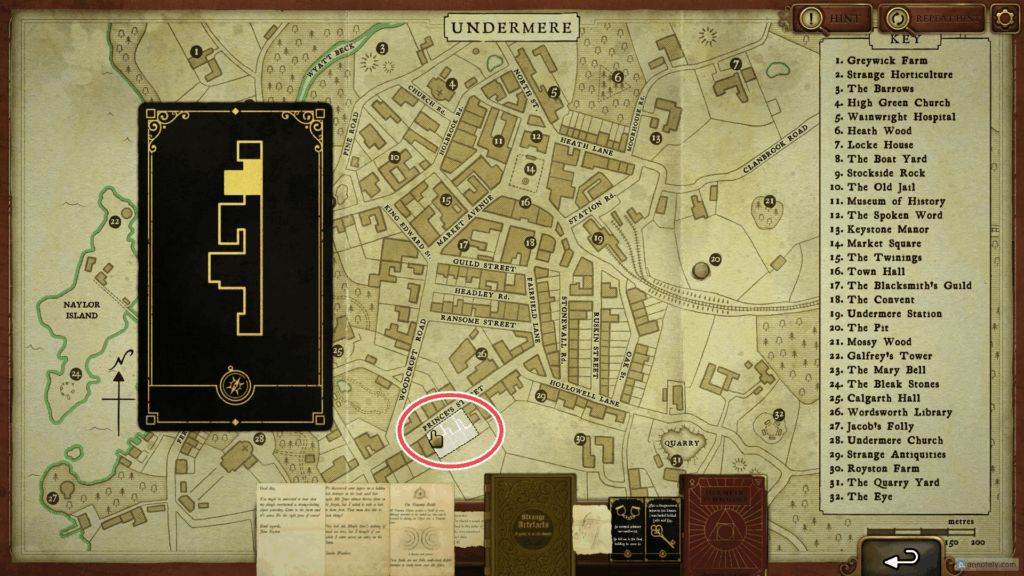
Click on the buildings to discover the following items:
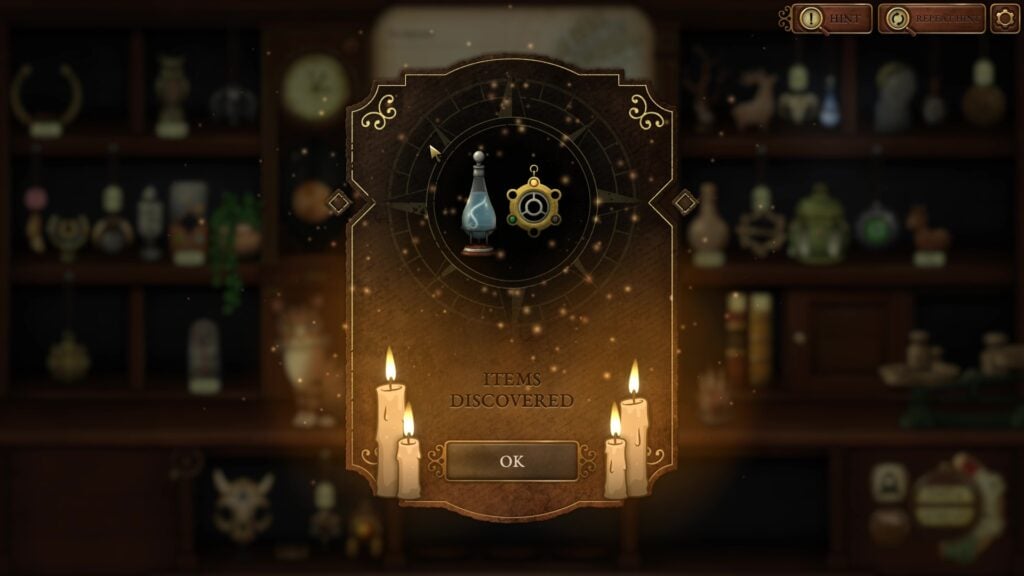
This is the item the customer wants:
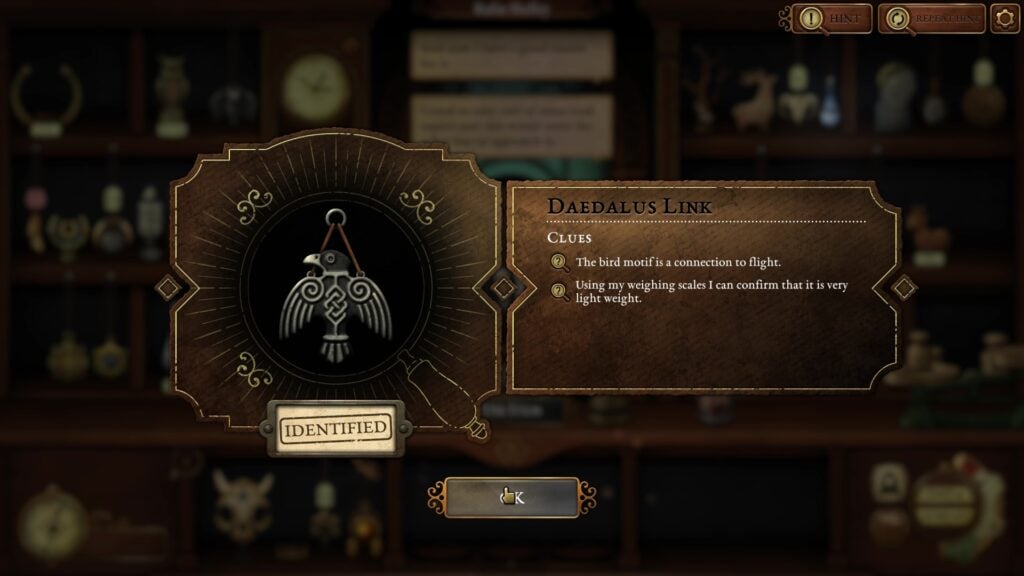
Daedalus Link
This light-weight item points to some facet of flight – a feather, wings, or birds. It’s a powerful object capable of producing a levitation field.
Read the letter from John Royston. Mailman David Chafer delivered the letter from Royston on Day 2. Daedalus Link can be found in the Royston Farm.
The item has a bird motif. You can use the weighing scale to check how lightweight it is:
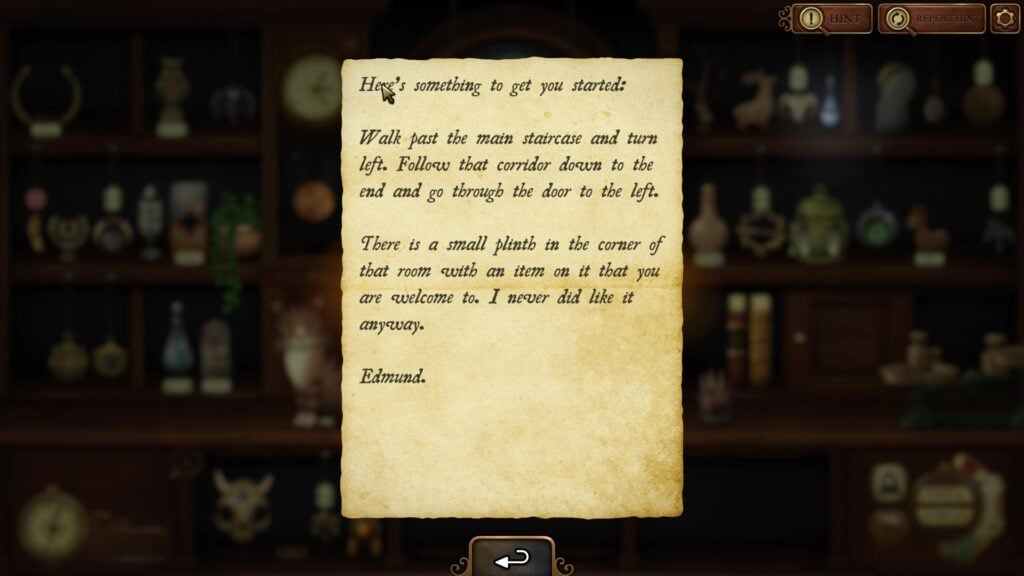
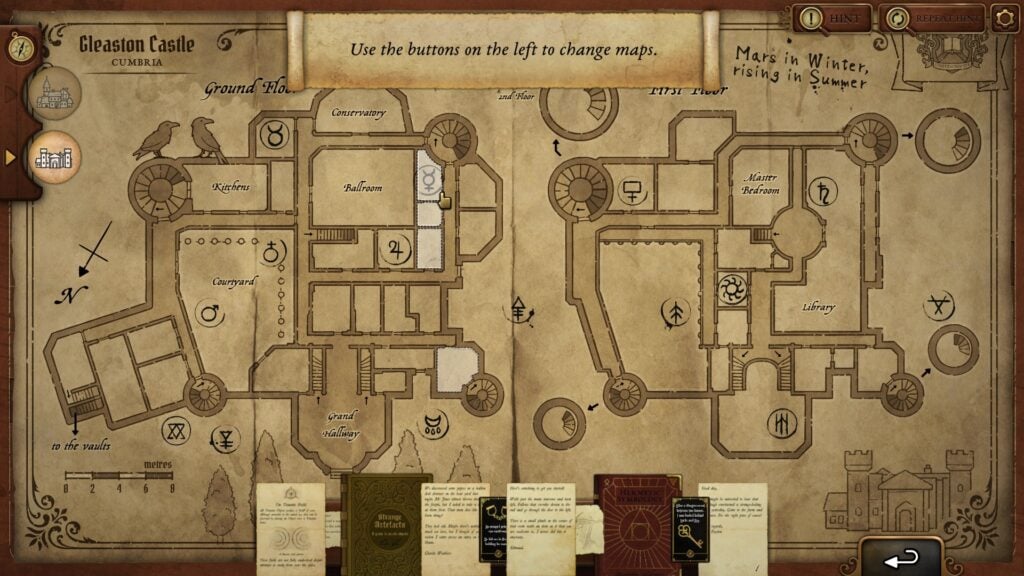
Edmund Bishop gives you a letter and a map of Gleaston Castle. Now you have two maps. Use the buttons on the left to switch between them:
End of Day 4. New Castle Map room clue card unlocked:
Day 5
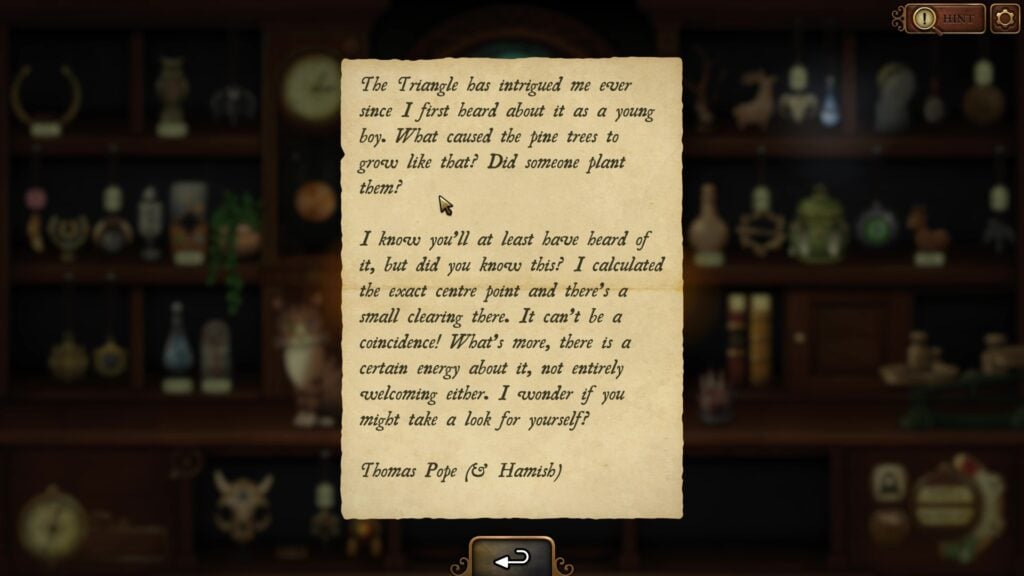
Letter from Thomas Pope
David Chafer delivers another letter. It’s from Thomas Pope and Hamish:
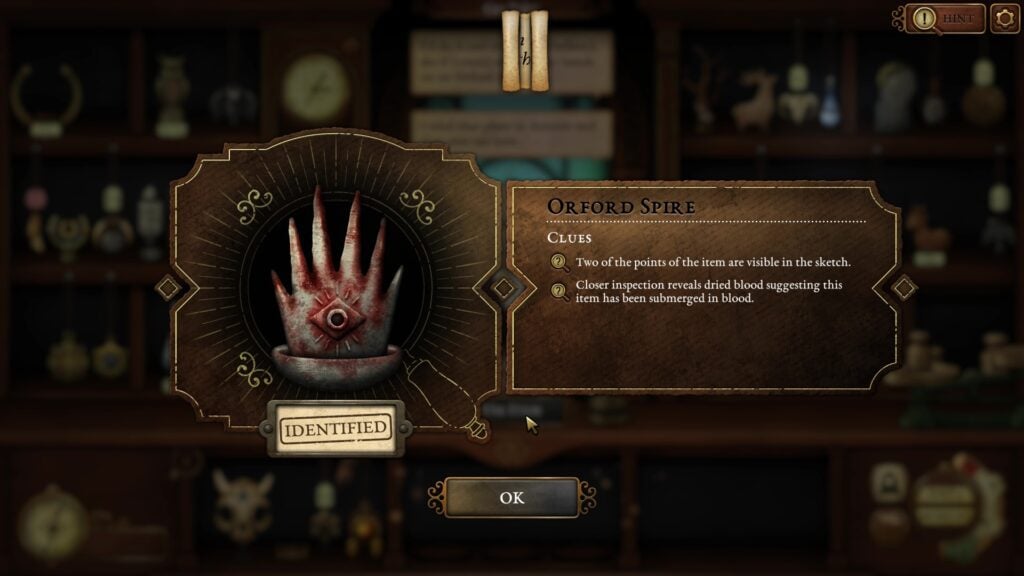
Orford Spire
You can find the picture showing two points of the item sticking out of the liquid in the Strange Artefacts book when you search for this item.
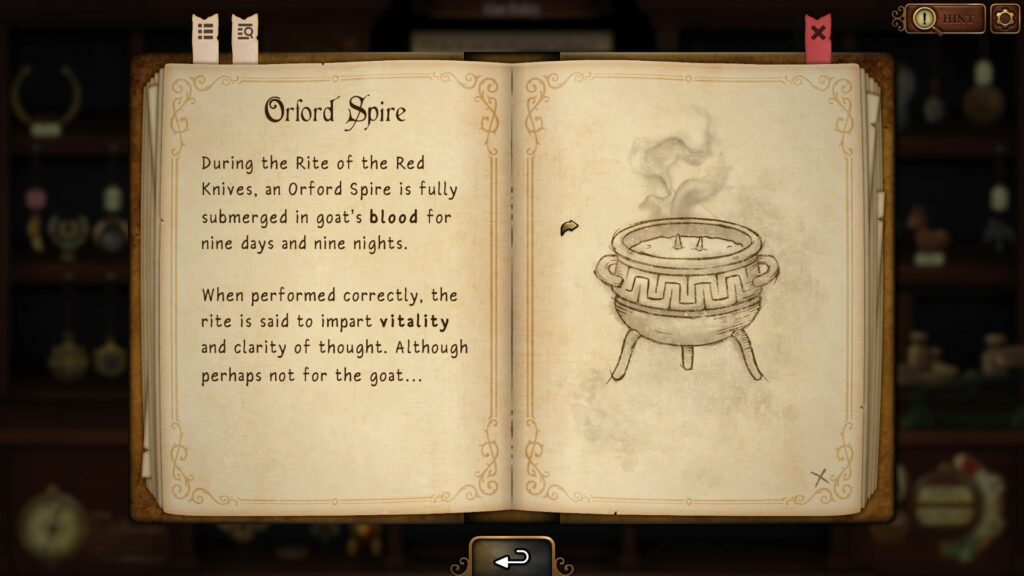
This strange item is the Orford Spire. Looks creepy af!
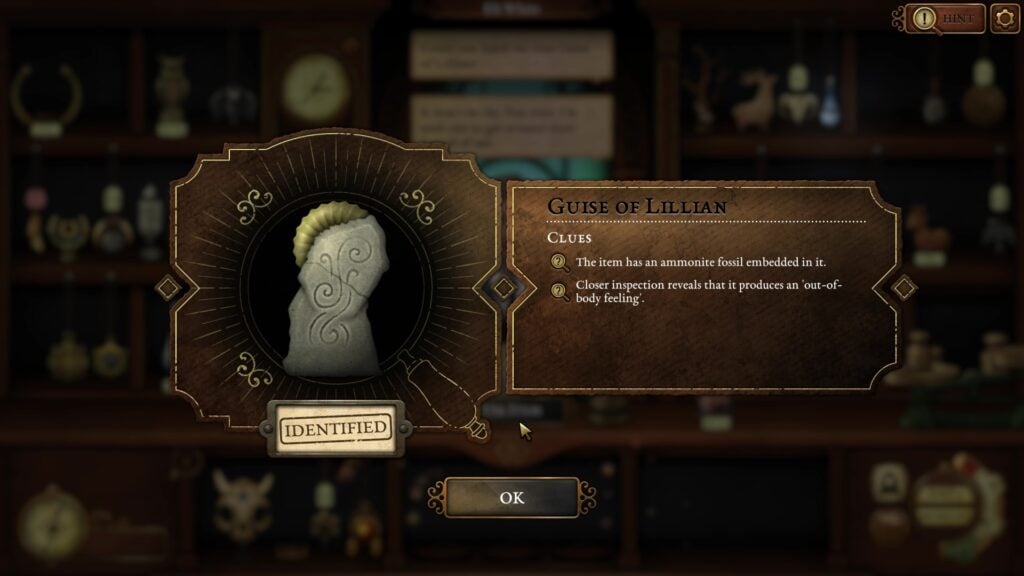
Guise of Lillian
This item makes use of one the remains of bygone creatures, such as petrified teeth, bones, even trilobites and ammonites.
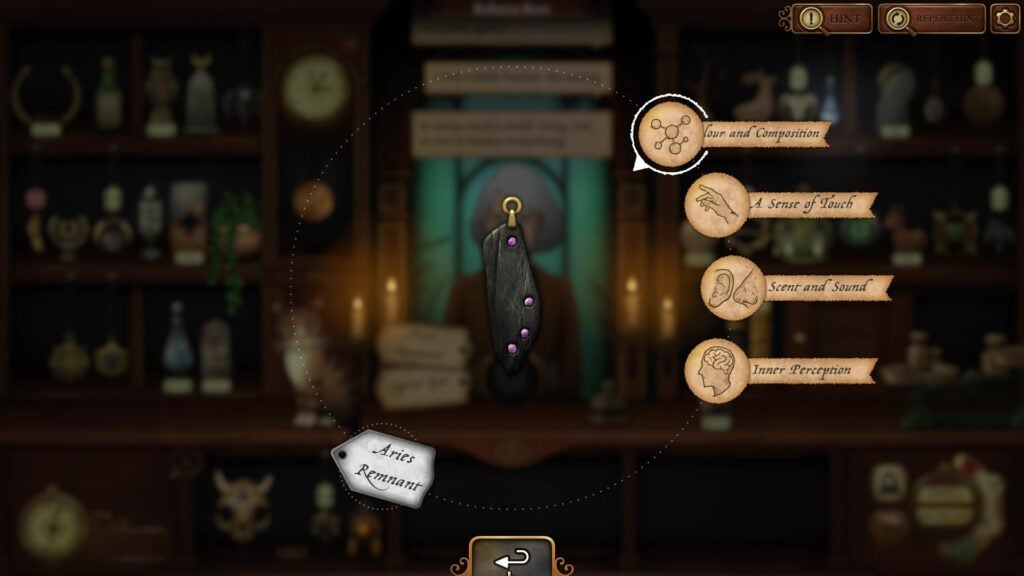
Aries Remnant and Spirit Eye
You will need to choose between these two items. Be aware that your decision will have consequences and may influence the game’s ending.
Aries Remnant
You will need the help of the ‘Locke and Key’ clue card (unlocks at the end of Day 3) to find the Aries Remnant on the map. The location where the item is stashed is behind Keystone Manor and Locke House, as shown in the screenshot below:
The gemstones in the Aries Remnant are arranged in the shape of the constellation that shares its name:
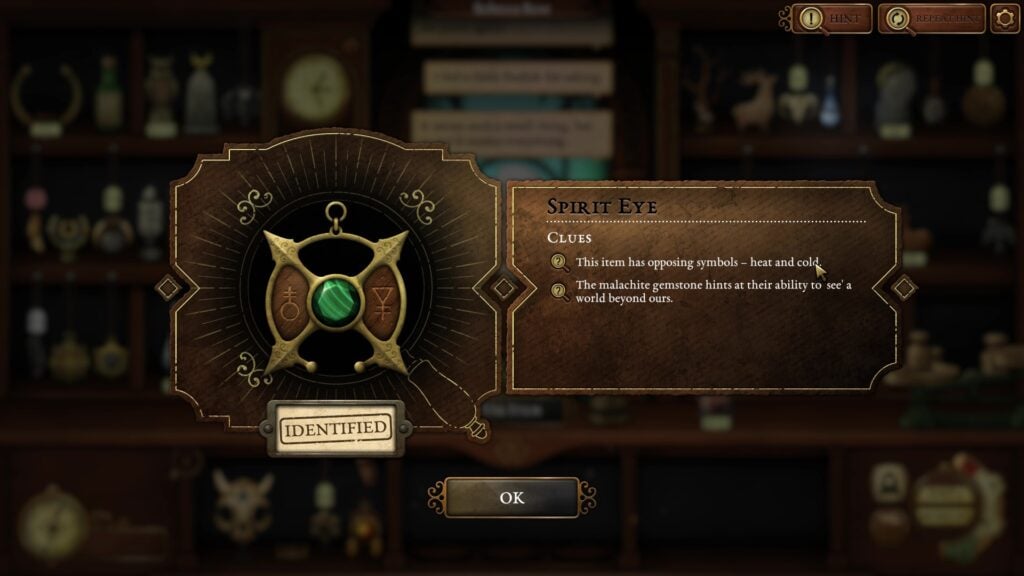
Spirit Eye
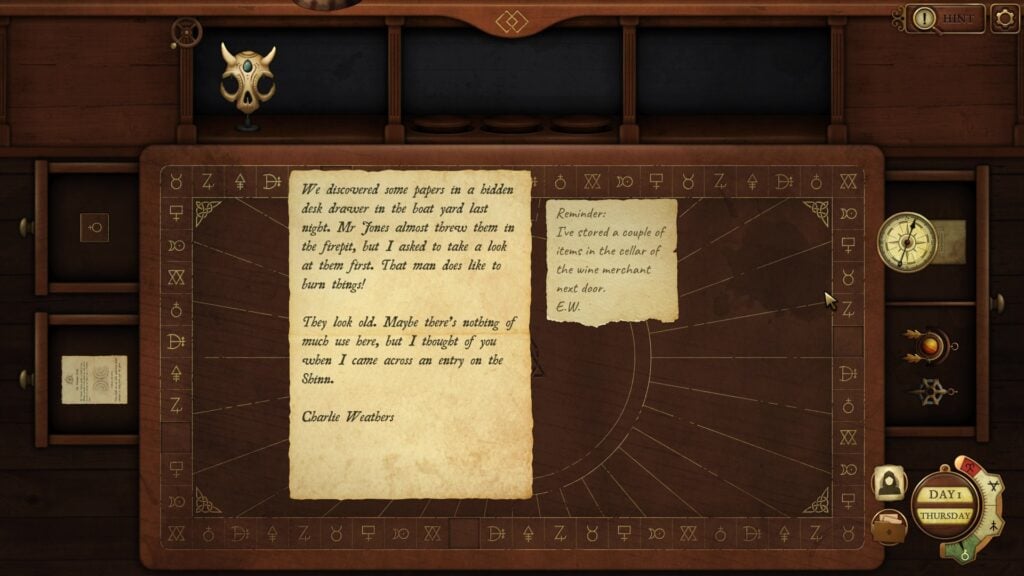
The Spirit Eye has two opposing symbols engraved on it. Open the top-left-hand drawer of the desk and pick the note, as shown in the screenshot below. You will find this note on Day 1 itself.
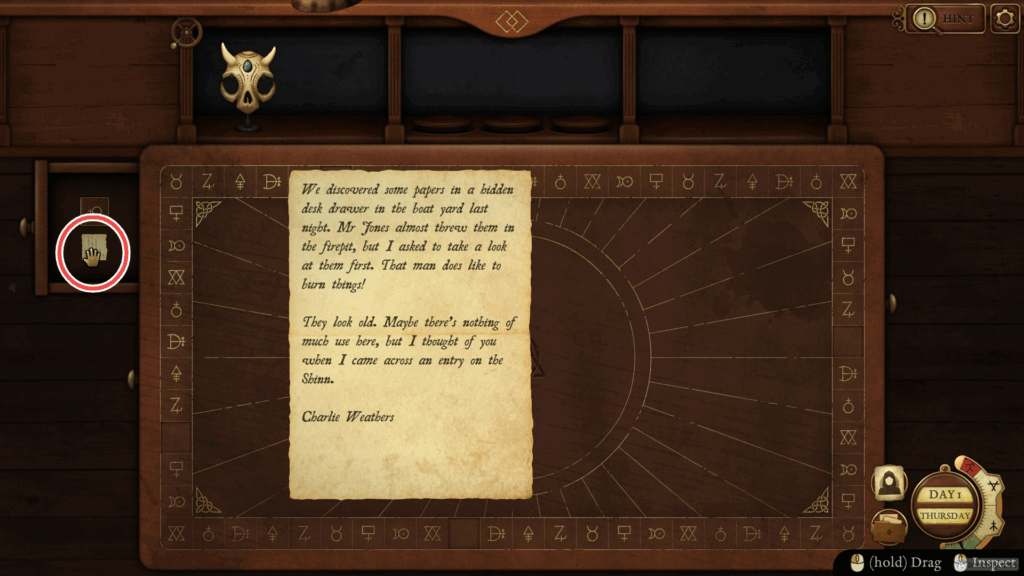
The note tells you that there are some items in the wine merchant next door to the Strange Antiquities shop. Click on Explore to open the map of Undermere. You will find the location of the items in the cellar of the wine merchant next door here, as shown in the screenshot below:
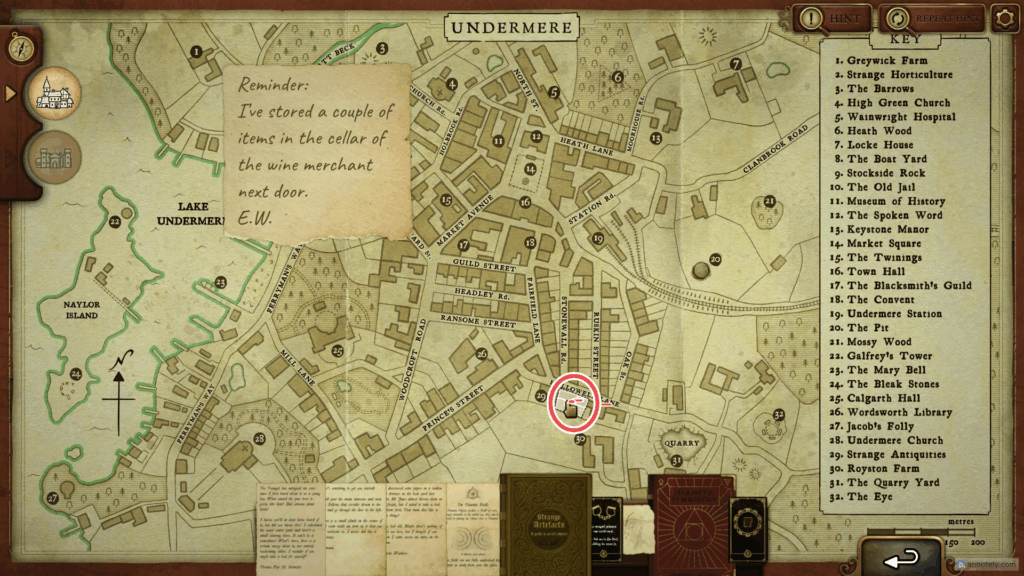
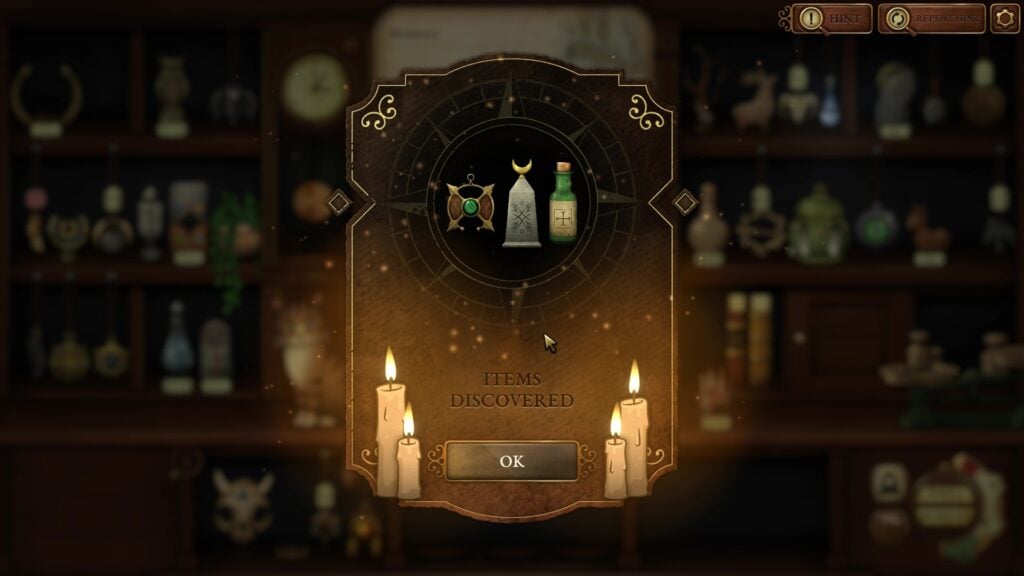
It’s located behind your shop. Click on it to obtain three items. The spirit eye is one of the three items:
In this game, I handed over the Spirit Eye to the customer:
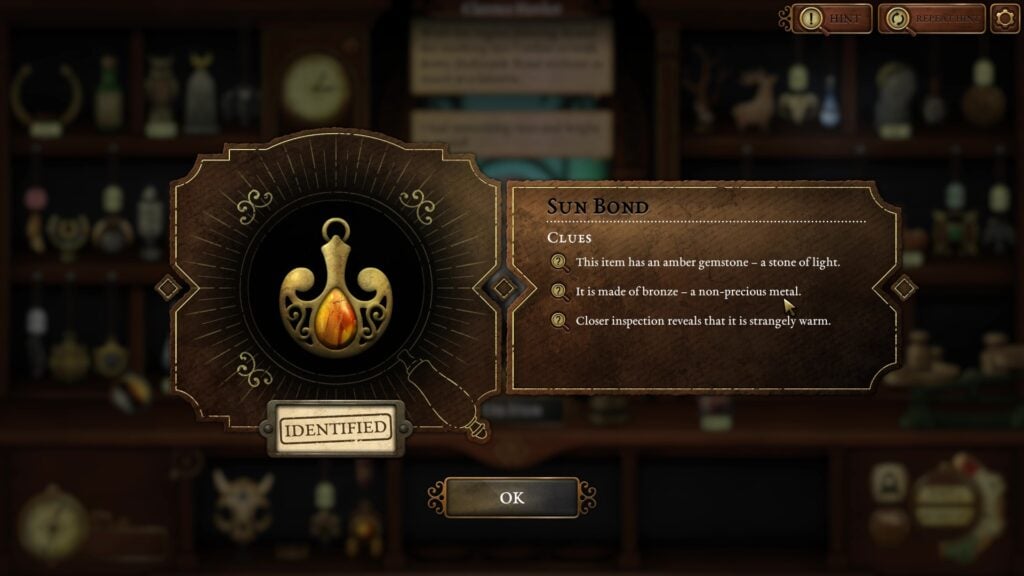
Sun Bond
Open the Strange Artefacts book and go to the Index. Turn the pages until you find the word “Sun.” Then, click on Sun Bond to navigate to that page:
It is a small and lightweight item made of non-precious metal and housing a gemstone of light.
You will find the location of the Sun Bond in the Undermere map. On Day 3, you got a crude map on a small piece of paper from Hugh Langston. Use it to find the location on the main map. It is located near Undermere Church:
You will obtain two pendants from that location. One of them is the Sun Bond. The other one is St. John’s Anvil.
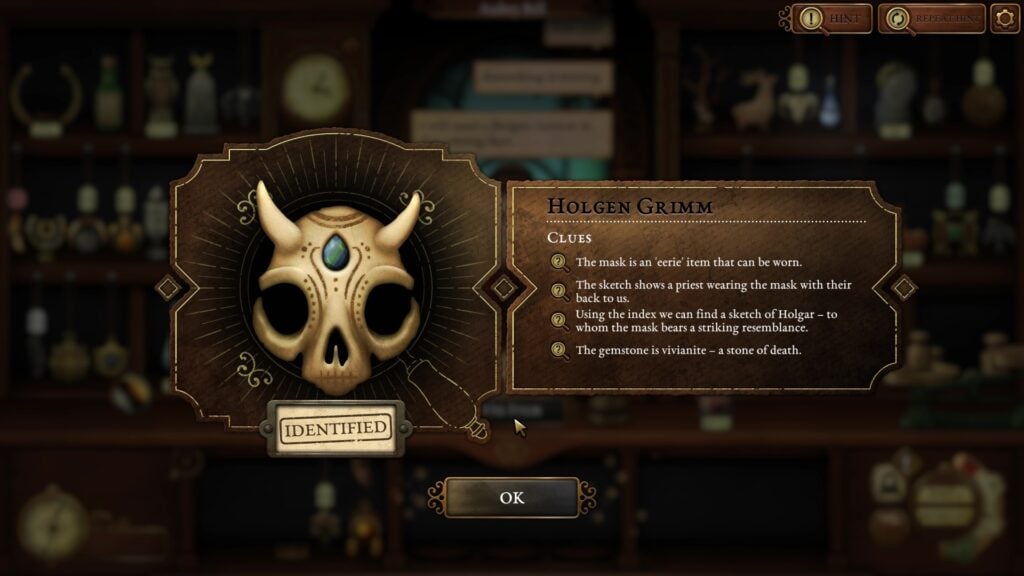
Holgen Grimm
It’s a mask worn by priests of Holgar. The picture in the Strange Artefact book provides a hint.
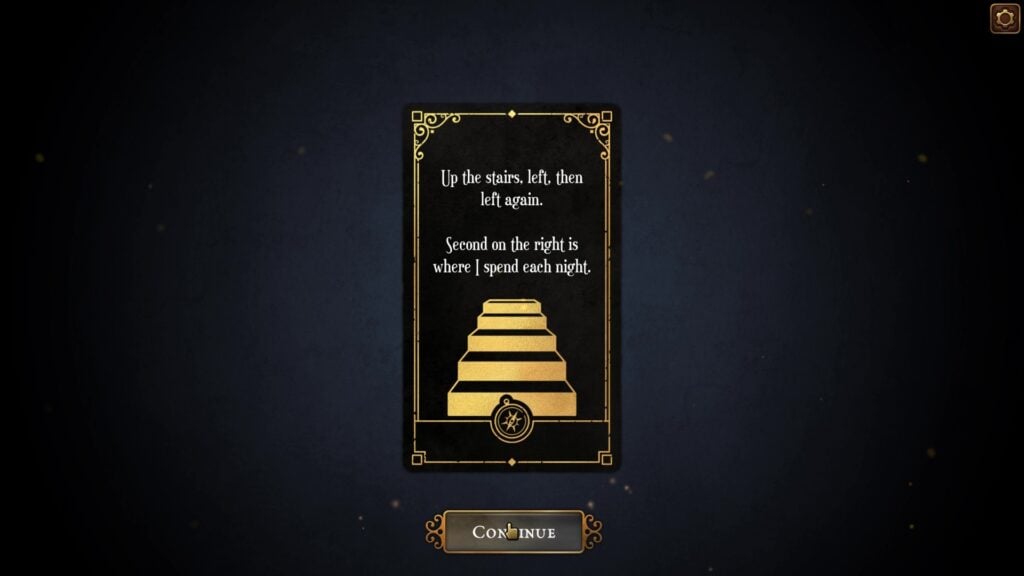
End of Day 5. You will unlock a clue card that may reveal a location in the castle map. The clue card reads: Up the stairs, left, then left again. Second on the right is where I spend each night.