He is Coming Guide: Tips to get Started.
He is Coming is a roguelite RPG auto-battler from Chronocle and Hooded Horse, set in a procedurally generated world filled with branching paths and unique points of interest. Pick items from treasure chests, combine them to create powerful items, and make the most of special tiles while exploring the sprawling overworld. This guide will walk you through the essentials—perfect for players curious about points of interest, controls, combat, and time mechanics.
Quick Access
Day/Night Cycle and Boss Battle
The day/night cycle plays an important role in He is Coming. On the tile-based map, an in-game day ends after your character has moved 50 tiles, and an in-game night ends after moving 30 tiles.
The day/night cycle also affects your character’s line of sight (LOS). During the day, your character can see up to 5 tiles, but this reduces to 3 tiles at night.
Enemy behavior changes a lot between day and night. During the day, their tiles don’t move.
At night, things get tense. If you enter an enemy’s line of sight and you’re within 3 tiles, they’ll start chasing you. So, once it’s dark, stay sharp — enemies become hunters the moment they spot you. They will move at the same speed as your character.
An in-game week is made up of 3 days and 3 nights. At the end of each week, get ready – a new boss will appear. Want to know what you’re up against? Press the Tab key anytime to check out the boss’s stats and details. Each time you start a new run, you’ll face a different randomly selected boss. No two runs are the same – expect surprises!
You can track the day/night cycle at the top of the map. As you move across tiles, the day bar gradually shrinks, bringing you closer to night. At the end of the bar, you’ll notice a skull icon — that’s your boss warning. Once the full 3-day/3-night cycle ends, a boss battle is coming. Plan your moves wisely!
Controls
While exploring, use WASD keys to move your character.
When you have moved to a special tile, a list of items pops up on your screen. Use your mouse to select an item from the list. Hovering a cursor over an item reveals more info about that item.
Press and hold the left SHIFT key to enter map mode. The map will be zoomed out. Use the arrow keys to navigate to already explored areas. Particularly important when fast traveling using waypoints.
Press and hold the TAB key to view Boss info before fighting them. Shows their stats and debuffs.
Hold the SHIFT key to enter map mode and use the arrow keys to move the cursor to an enemy tile to know more about their stats and status effects, if any.
Game Modes
He is Coming has three game modes:
- Woodland: Expect powerful enemies. Unlock Swampland after winning a run. There are 14 bosses and 3 mini bosses in Woodland.
- Swampland: More powerful than woodland bosses. Swampland has 11 bosses.
- Kingmaker: The bosses are built from defeated characters of other players. This game mode uses all enemies you have encountered in the Woodlands and Swamplands.
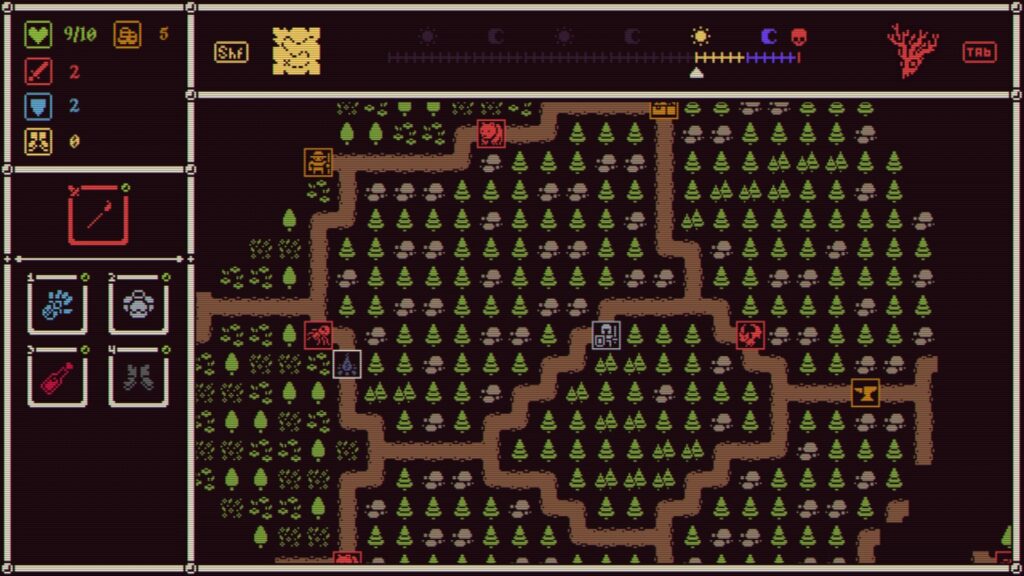
Combat
On the map, red tiles are enemy tiles. Combat begins when your character tile is touched by a red tile. The game has auto-combat, but you can skip the combat animation and know the results instantly. All you have to do is press the CTRL key in exploration mode to activate “Quick Battle”. Saw that lightning icon in the lower right corner of the screen? It means the quick battle has been activated.
Quick battle mode saves time, but I prefer watching the battle take place on my computer screen.
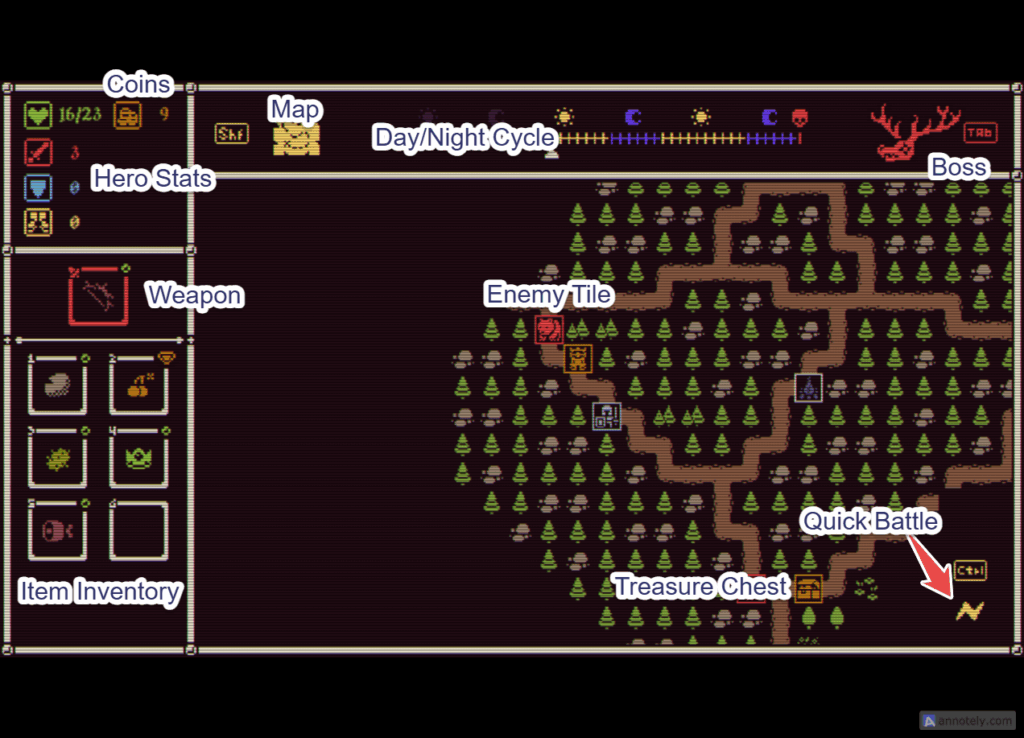
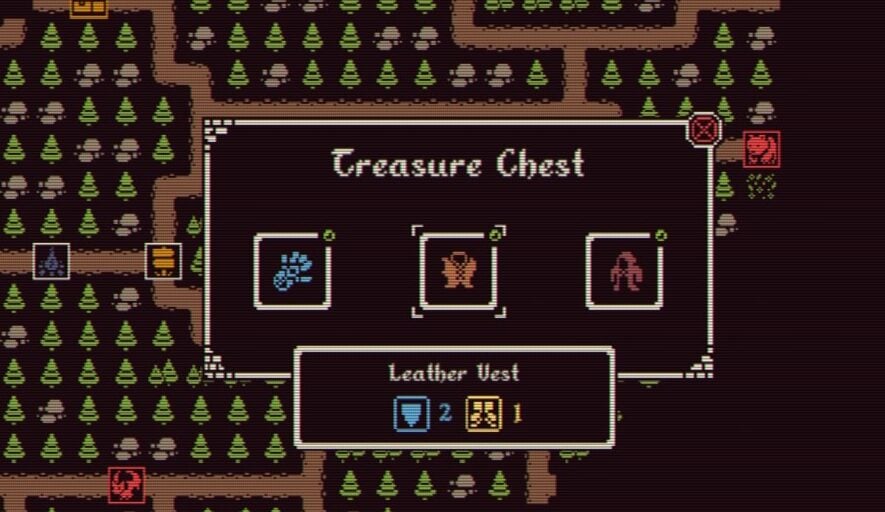
Before fighting enemies, make sure you explore the map to find treasure chests. In the first run, you will be able to discover 2-3 treasure chests before encountering any enemy. Chests contain weapons, armor, and items that grant powerful buffs. You can avoid enemy contact during daytime as the enemy tiles remain in their place and don’t follow you. This is the best time to explore and find treasure chests.
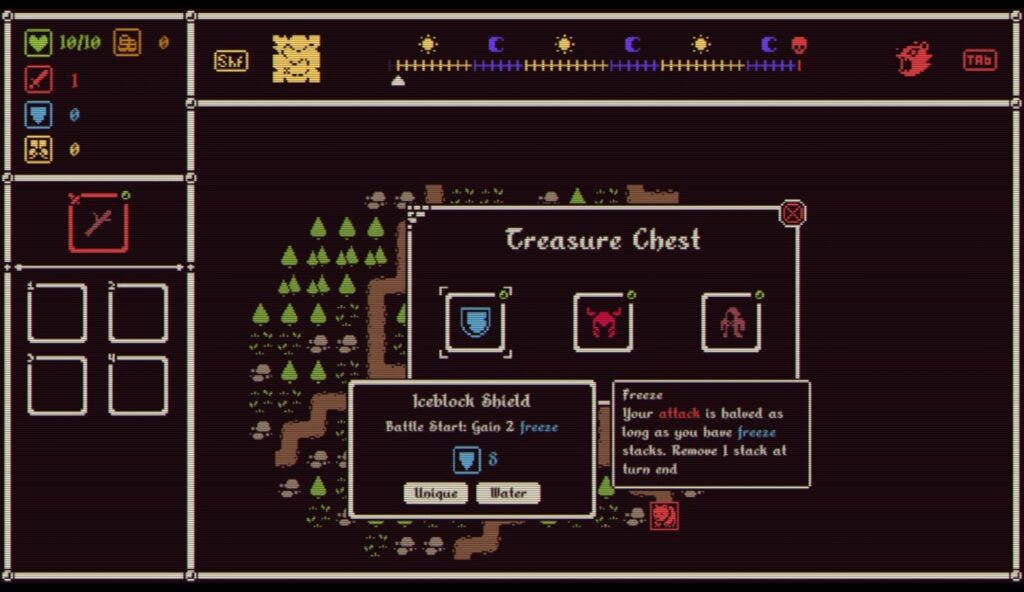
Each treasure chest lets you choose one out of three items – so choose wisely. If a weapon stronger than your current one is available, prioritize picking it. You can then choose armor or an item that grants speed buffs on your next discovery. The opponent who has higher speed points always gets to attack first. Next, go for a potion/HP restoration item,s and finally an item that grants buffs – a better choice would be a cherry bomb or thorn if you are going for a bomb build, as they will inflict more damage to enemies when battle begins, before they attack. While your choice depends on what’s available in the chest, try to follow this order of importance: Weapon > Armor > Potion/ HP Restoration > Buff/Bomb Item for the best advantage in combat.
You start your adventure with one weapon slot and four item slots. Additional item slots will unlock as you defeat bosses. Items activate in numerical order. While exploring, you can rearrange items by selecting the item on the left-hand side of the screen and then clicking the item you want to swap it with. To prioritize an item, move it to an earlier slot.
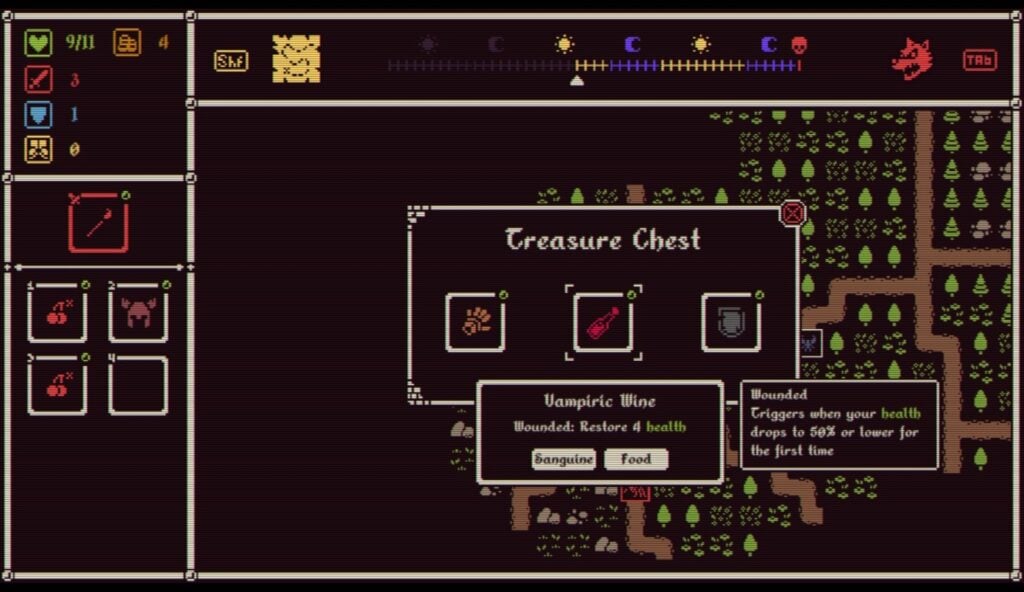
Hint: Always choose Vampiric Wine if you find it in a chest. Gets triggered when your health drops to 50% or lower for the first time and restores 4 HP.
Pay attention to the status effects of certain weapons before equipping them. A good example is the Brittlebark Bow.

- ATK: 4
- Drawback: After every 3 strikes, you lose 2 attacks.
During combat, take a look at the four key stats at the bottom of your character and the enemy:
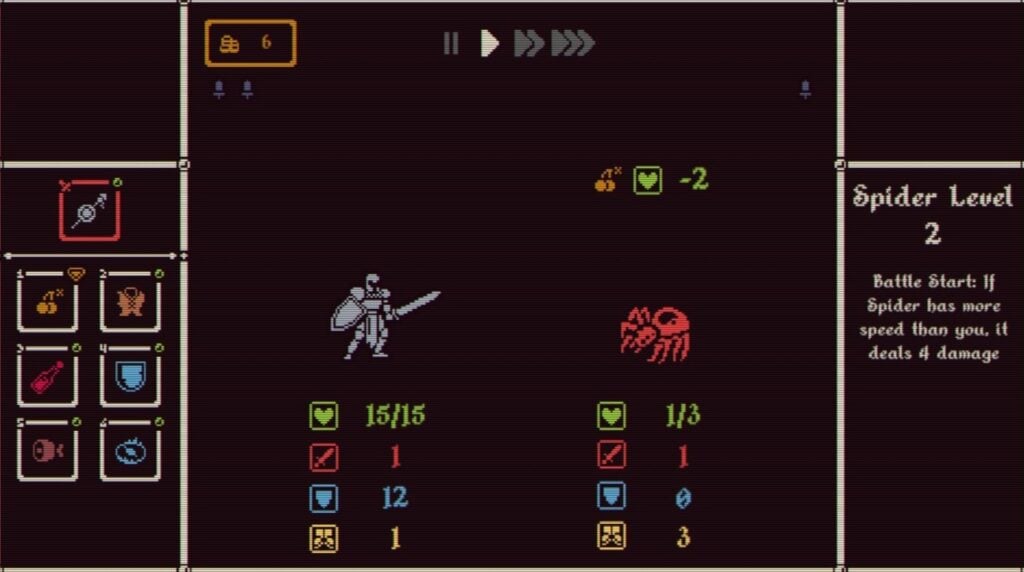
- Health (Green Heart): Shows you and your opponent’s HP. You lose if your HP reaches 0. An enemy loses if their HP reaches 0.
- Attack (Red Sword): How much damage an opponent inflicts in each turn.
- Armor (Blue Shield): Protects your HP while soaking damage.
- Speed (Yellow Boots): Whoever has the higher speed stat gets the first strike.
Pay Attention to Debuffs by Enemies
Besides monitoring enemy stats, you should also watch for any negative status effects they inflict on your character. You can view the negative status effects during exploration. Here’s how to do this:
Press and hold the left SHIFT button and use the arrow keys to move the cursor to the enemy tile. By doing this, you will not only view its stats but also any negative status effects on your character during combat:
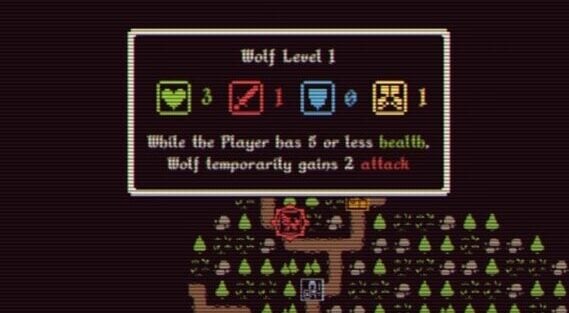
Example:
1. Spider: If a level 1 spider has a higher speed than you, it inflicts 3 damage.
2. Bear: If the player has armor, bear gains 3 attack.
3. Wolf: While the player has 5 or fewer health, Wolf temporarily gains 2 attack.
Also, keep an eye on debuffs on the right side of the boss battle screen.
Use Coins to Purchase Items
You will earn coins after defeating an enemy. The coins can be used to purchase rare items and weapons from the Traveling Merchant or can be used to purchase edge for your weapons at the forge. More on these two special tiles in the next section.
How to Replace an Item in Your Inventory
You may come across a rare item in a treasure chest or find a better one from the traveling merchant. If your inventory is already full, consider swapping out an older, less valuable item for the new one. Simply purchase the item or select it from the chest, and a prompt will appear asking you to choose which item to replace.
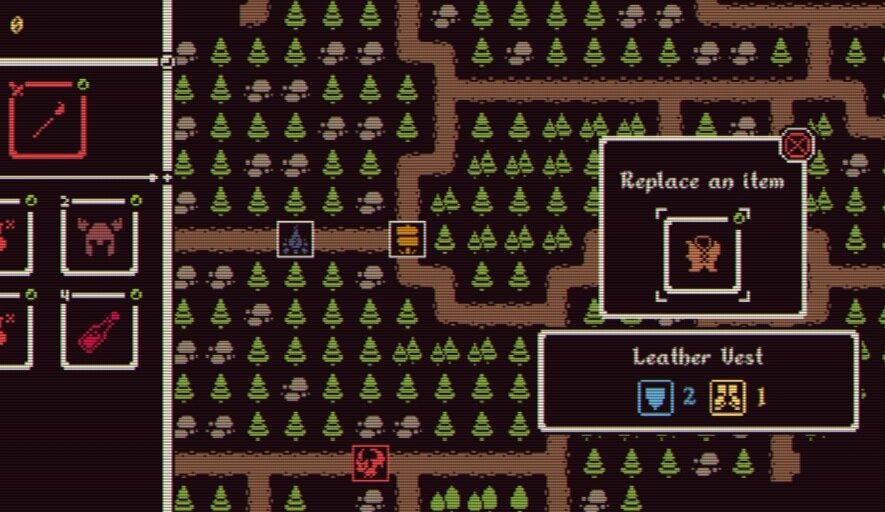
Using your mouse, left-click to select an item from your inventory to replace it with the new item.
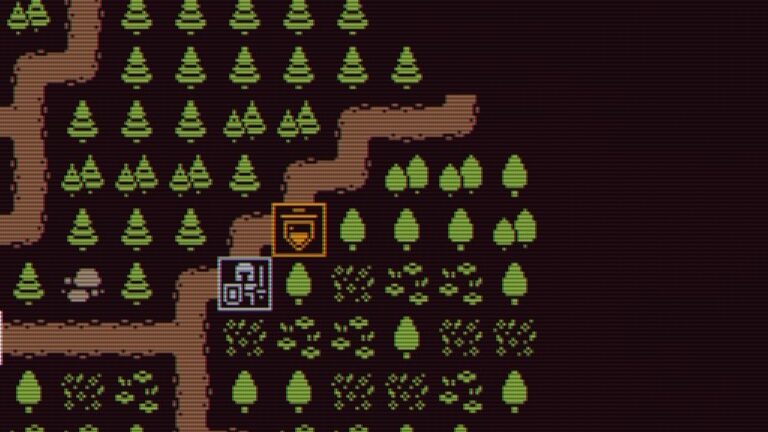
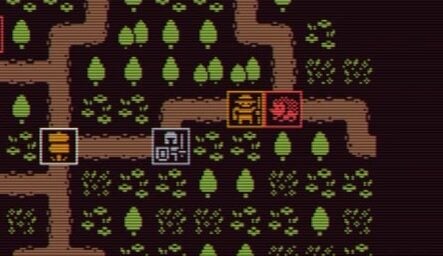
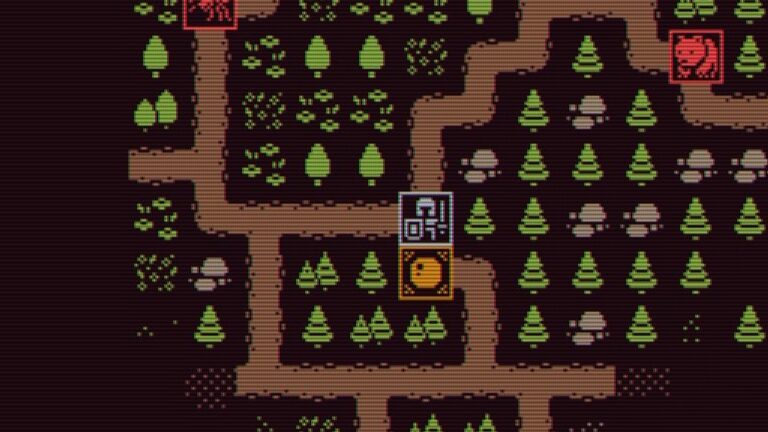
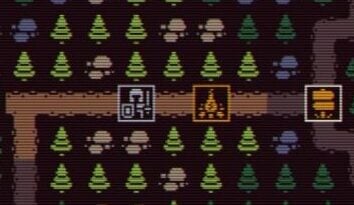
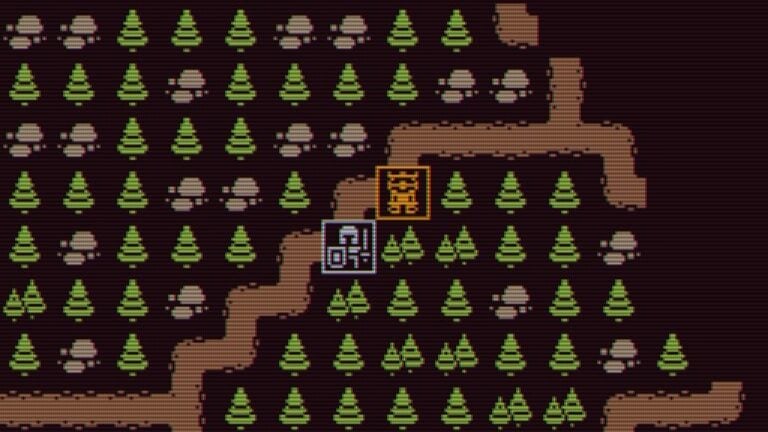
Points of Interest
While exploring a map, certain points of interest will assist you in your adventure. They have unique icons and can be very useful. While writing this guide, I came across these unique tiles:
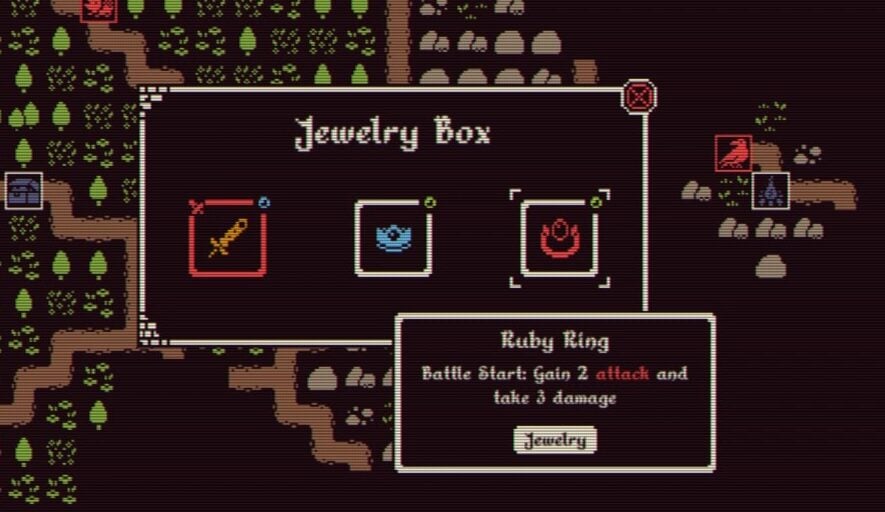
Jewelry Box
Allows you to choose one of three unique accessories or rings. Each accessory grants a powerful stat-enhancing buff.
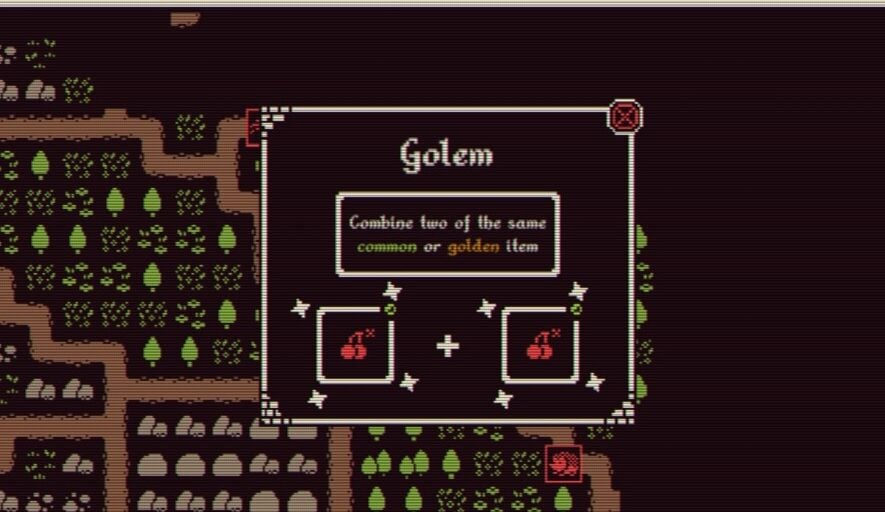
Golem
Lets you combine two of the same items. I discovered golems that allowed me to combine two of the same common or golden items.
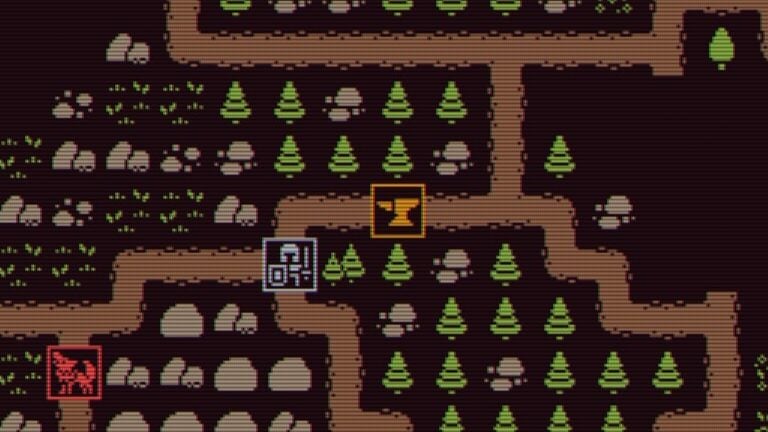
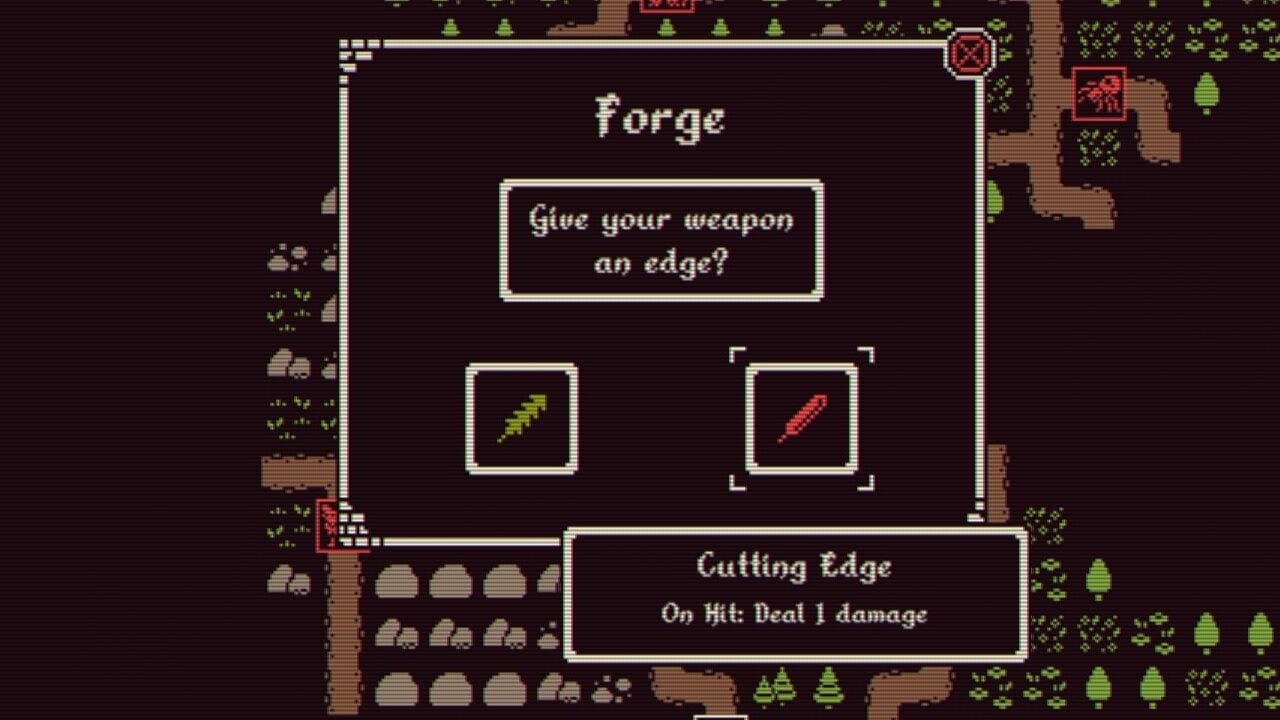
Forge
Gives your weapon an edge. Augment weapon stats and may even provide buffs. Free for the first time, but future enhancements at other forges will cost coins.
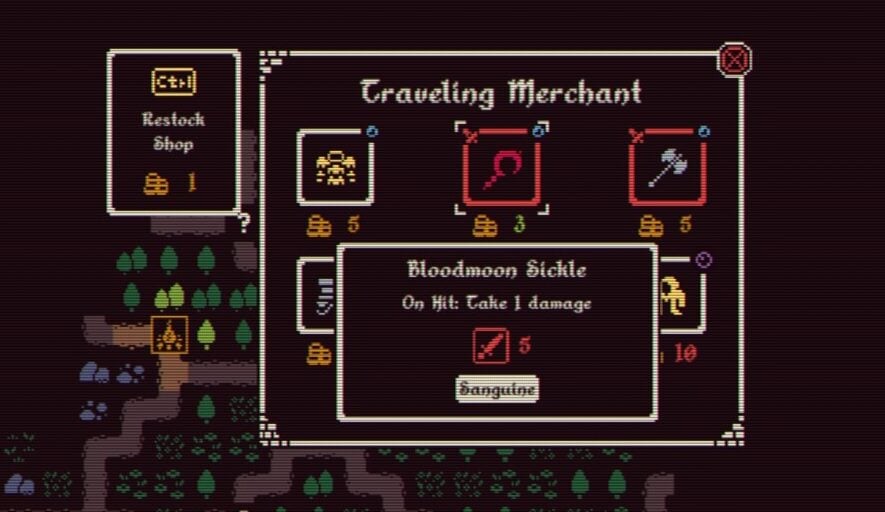
Traveling Merchant
It lets you purchase better items/weapons/armor using coins. I purchased the Bloodmoon Sickle using 3 coins. You can also restock the shop if you want a different set of items. Costs 1 coin. Press CTRL to restock while purchasing from the merchant.
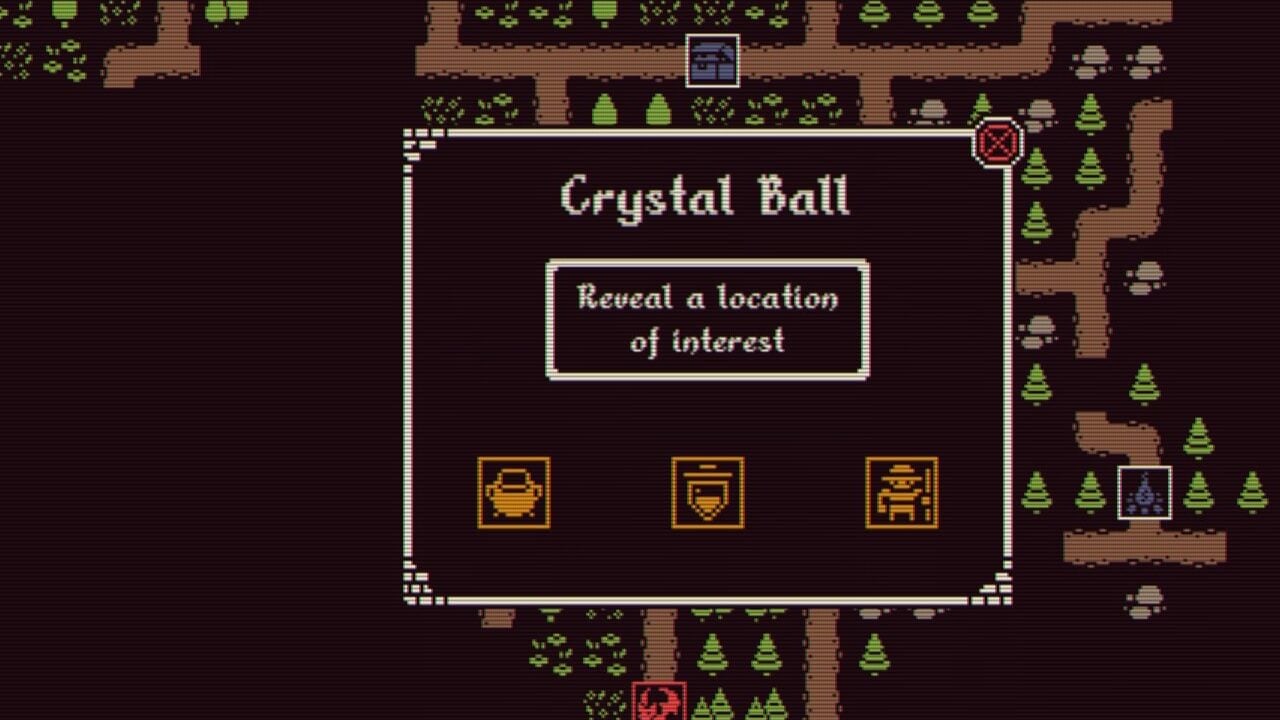
Crystal Ball
Choose one of three special tiles from the crystal ball to reveal their location.
Cauldron
Combine two different kinds of basic food items.
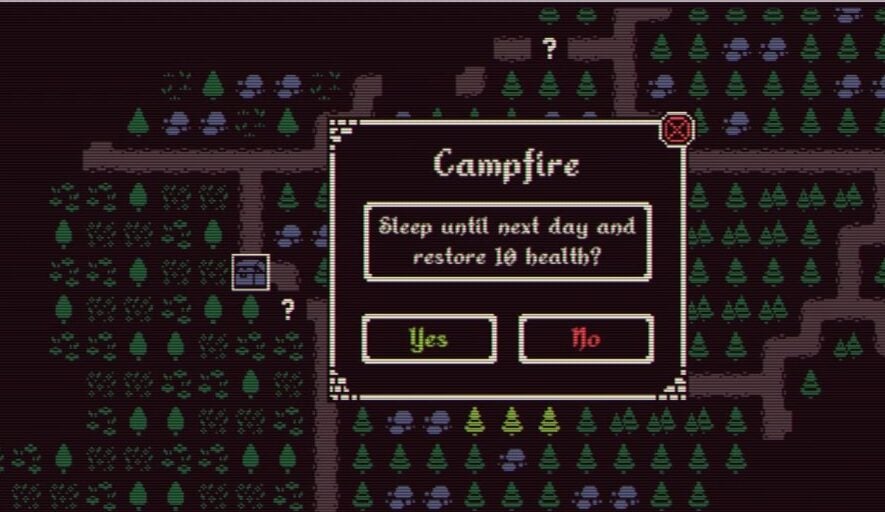
Campfire
Lights up only at night. Move to this special tile to sleep until next in-game day and restore 10 health.
Fairy
Select a weapon or an item from your inventory to transform it into another item of the same rarity.
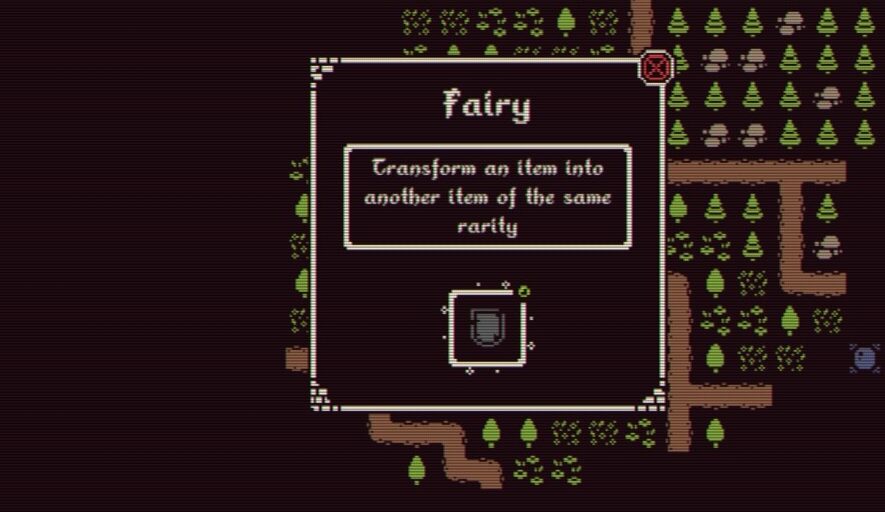
In the above screenshots, I selected the Shield of the Hero item and transformed it into a Redwood Helmet with the help of the Fairy. Shield of the Hero granted 3 Armor whereas Redwood Helmet, which was of the same rarity, granted 1 health and 1 armor. It also grants the “Exposed” buff, which activates the first time you lose all your armor, restoring 3 Health.
Farmer
Lets you choose one out of three food items that augment your health, weapon, and armor stats. Has cherry bombs and spiny chestnuts for sale.
Watchtower
Removes the fog and gives a clearer view of the surrounding area. Just move over the watchtower to allow you to see the previously hidden area around you.
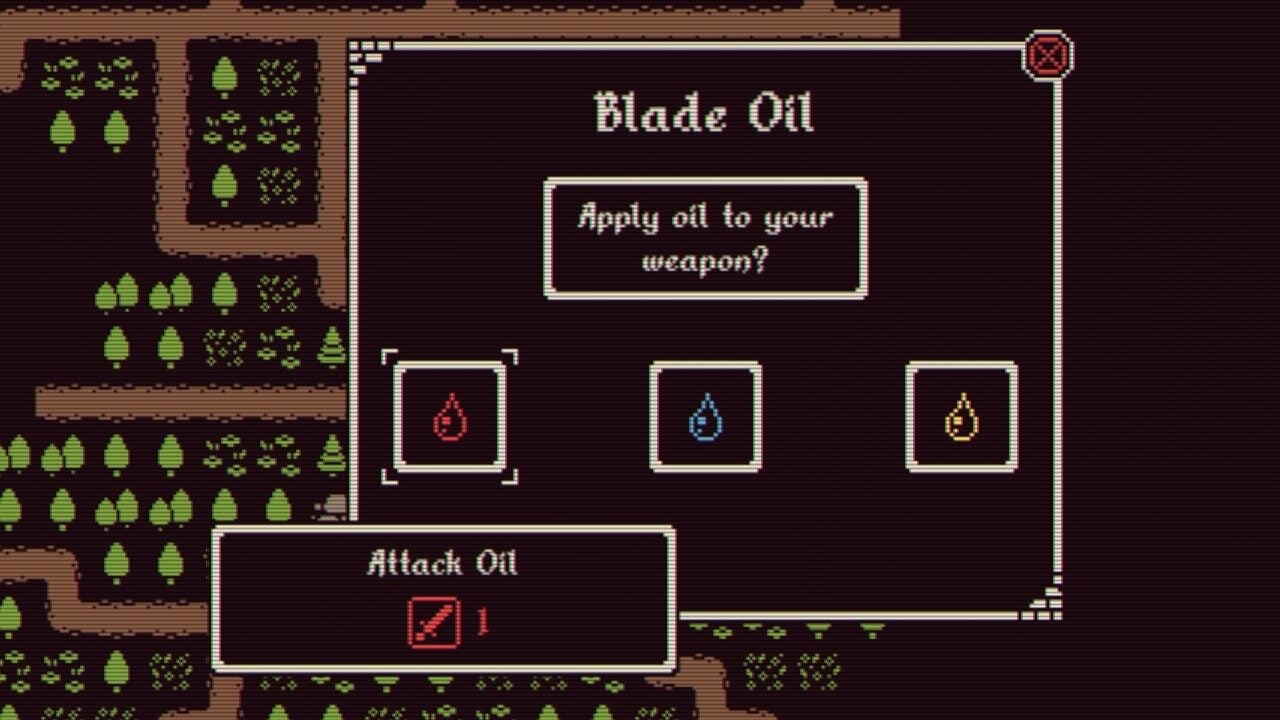
Blade Oil
Choose to apply one of three oils – Attack, Armor, and Speed. Increases Weapon ATK, Armor,r and speed stats.